Working with Basic Translucency
This page provides a tutorial on creating a translucent V-Ray Material.
Overview
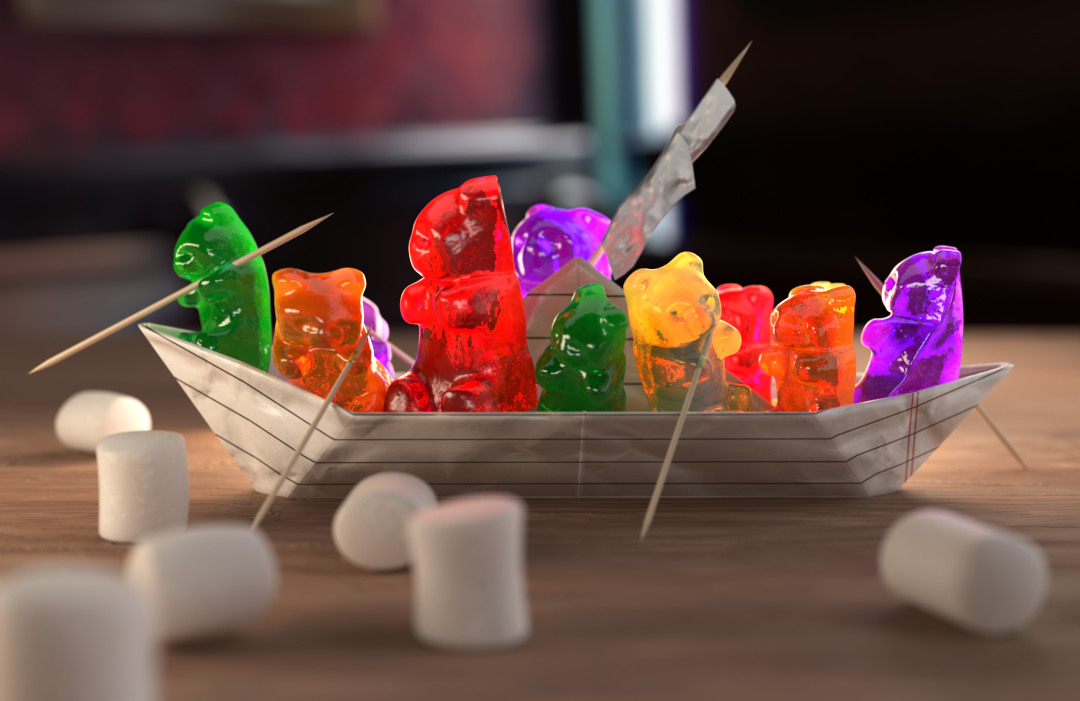
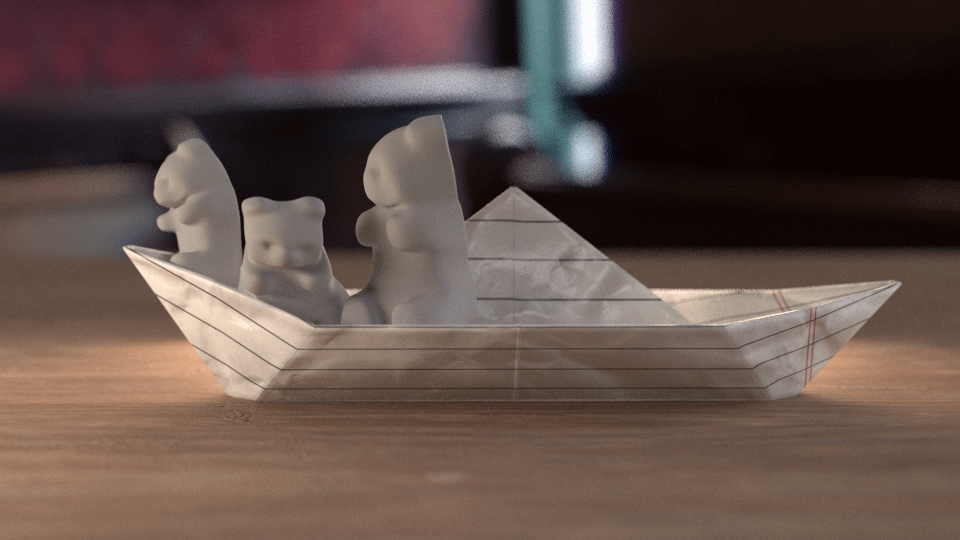
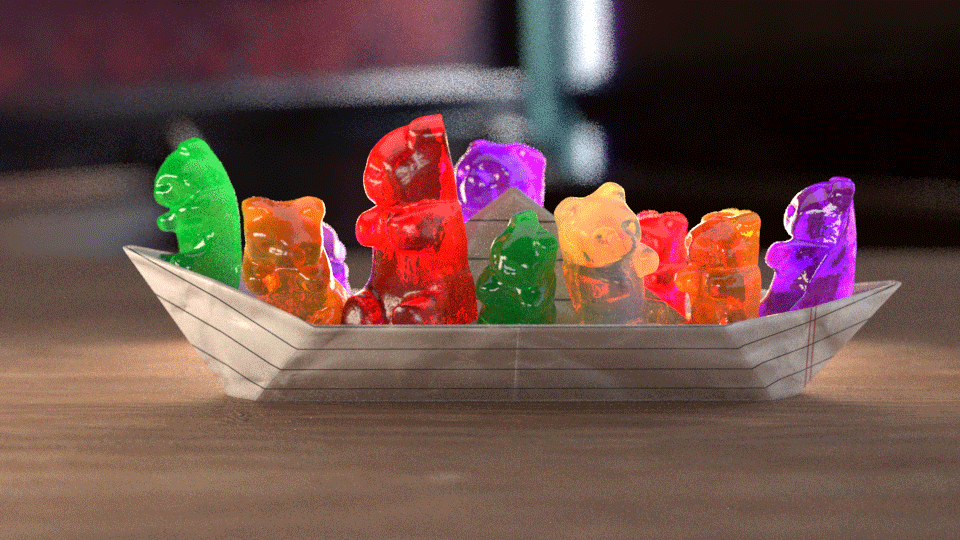
This tutorial covers working with basic translucency in a standard V-Ray Material to create stylized gummy bears of various colors.
Tutorial Assets
To download the scene used in this tutorial, click on the button below.

Scene Set-up
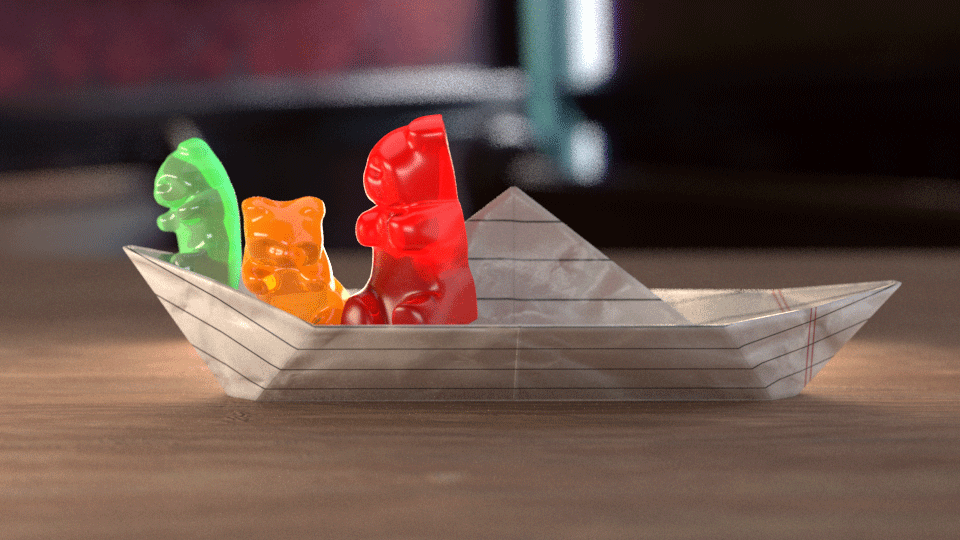
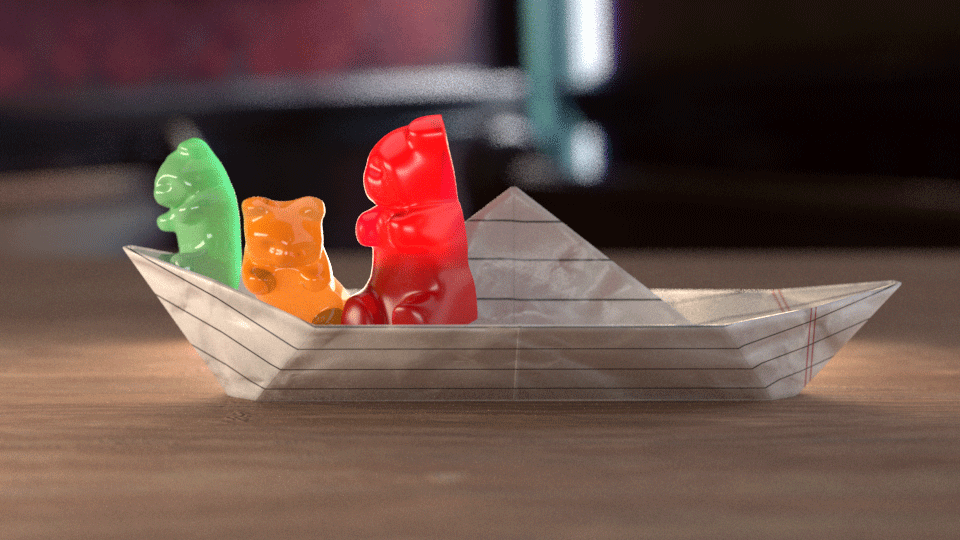
Open the file provided from the link above. This setup contains a number of bears and lighting already set up using 5 V-Ray Plane Lights and a V-Ray Dome Light .
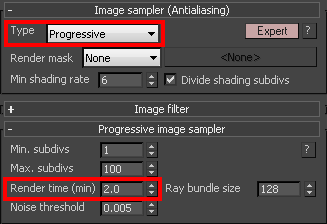
While setting up the translucency on the bears, lower render settings will be used before being stepped up for the final render. This allows fast feedback on changes. Ensure in the Render Setup, that the V-Ray tab is selected and that the image sampler Type is set to Progressive with a Render time (min) of 2.0. This will give results that are clean enough for our visual feedback, because while there will be some noise in the test renders, it is good enough for our purposes.
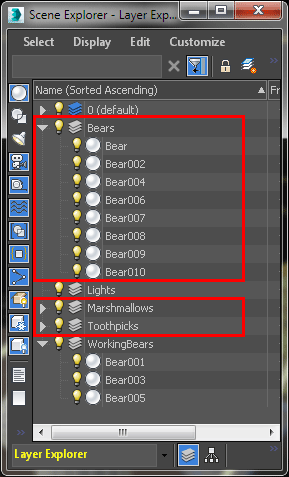
The scene has been set up in layers so that things not being worked on can be hidden. Click on the Toggle Layer Manager button on the tool bar to make the layer manager visible.

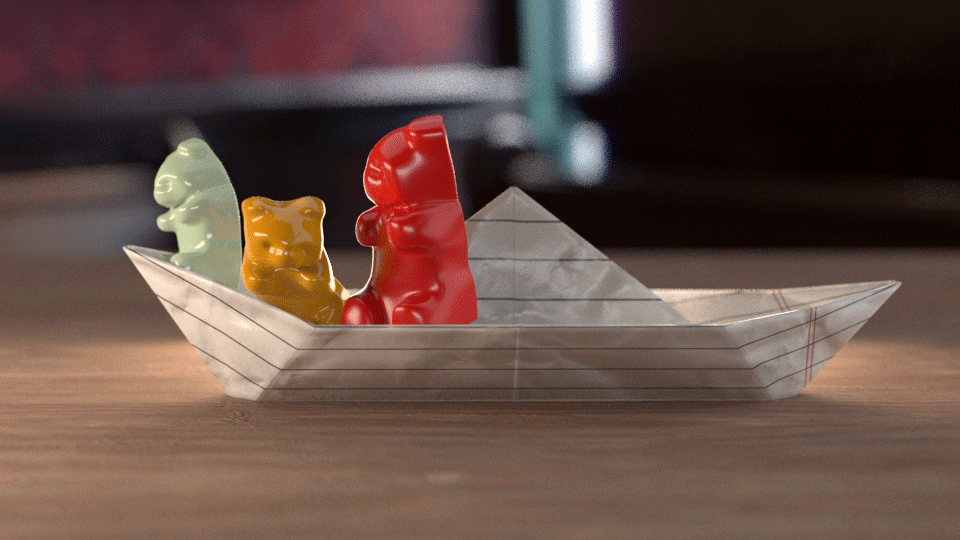
As we shall only be working in this example on 3 of the bears, hide the Bears, Marshmallows and Toothpicks layers by clicking on the light bulb icon next to each of those layer groups. The bears within the layer named WorkingBears are the ones we shall be working with.
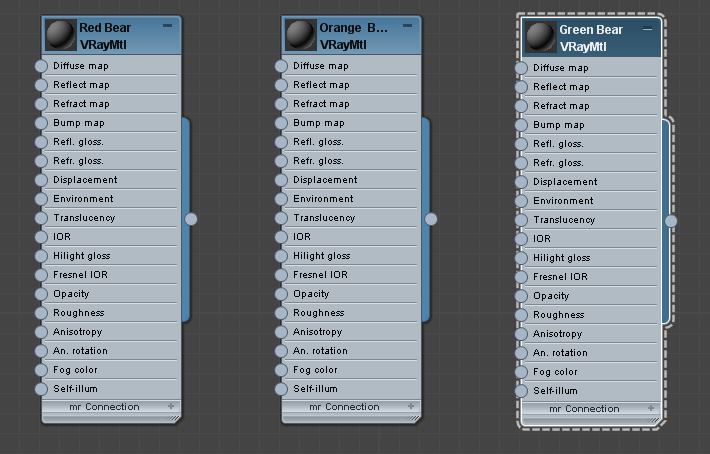
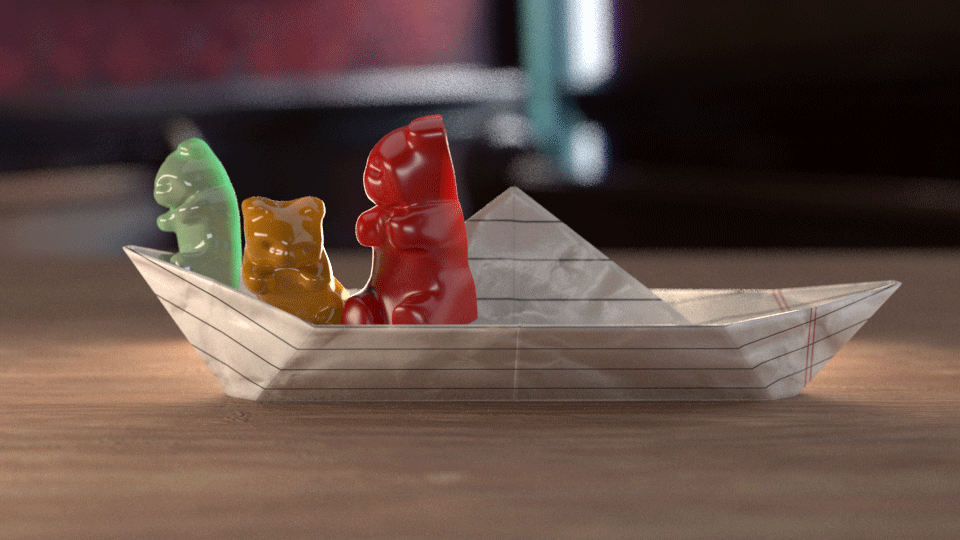
In the Material Editor (hotkey: M), create three standard V-Ray Material's for each of the bears . Rename them "Red Bear", "Orange Bear" and "Green Bear" and apply these to one of each of the three bears at the front of the paper boat.
Adding Translucency
Basic Settings
Select the Red Bear material and set the Diffuse color swatch a red color (HSV: 255, 255, 255) then select the Orange Bear material and set the Diffuse color swatch a red color (HSV: 19, 255, 253) and finally select the Green Bear material and set the Diffuse color swatch a red color (HSV: 80, 71, 227).
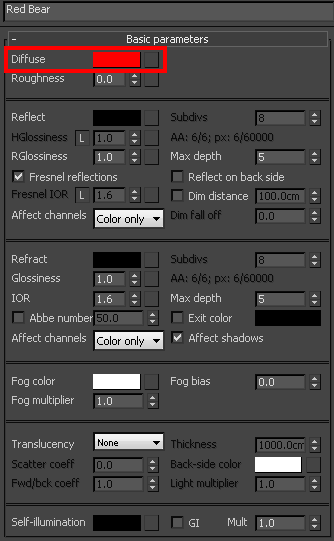
Red Bear material
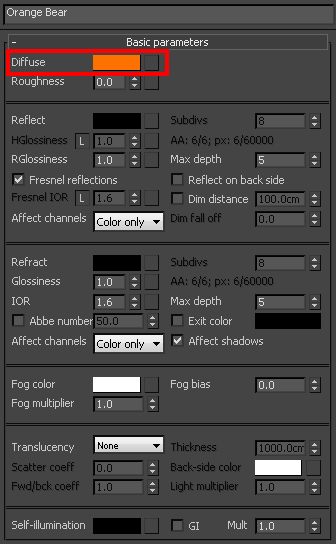
Orange Bear material
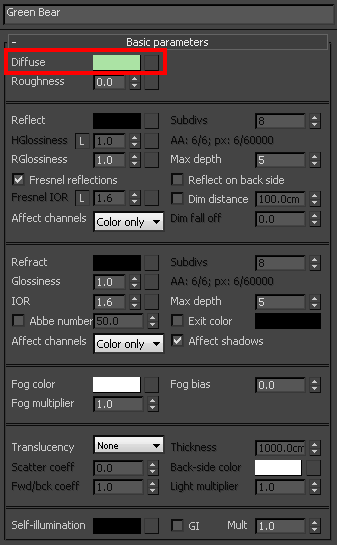
Green Bear material

For the Red Bear material change the Reflection Color swatch to a value of 221, and set the Reflection Glossiness value to 0.75.
For the Orange Bear material change the Reflection Color swatch to a value of 221, and set the Reflection Glossiness value to 0.9.
For the Green Bear material change the Reflection Color swatch to a value of 221, and set the Reflection Glossiness value to 0.9.
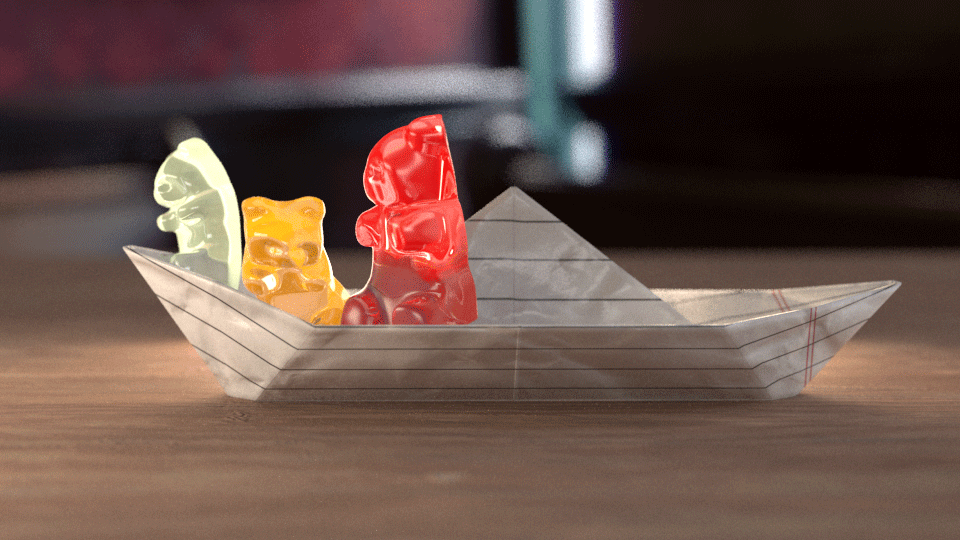
Select the Refraction color swatch and change it to a Value of 137 for each of the three materials. Some light is now visible through the gummy bears. Changing the refraction color closer to white takes away from the diffuse value, so make sure this value is not pure white.
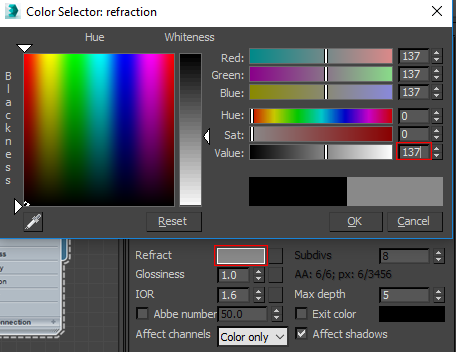
Make sure to use only greyscale values in both the Reflection and Refraction color swatches to get realistic results.
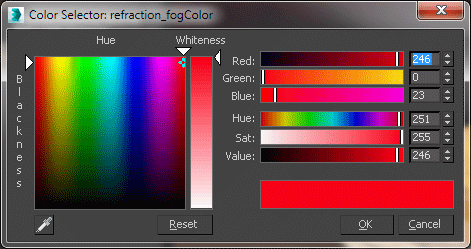
For the Red Bear material open the Fog Color swatch and select a mid-range red (HSV: 252, 255, 246).
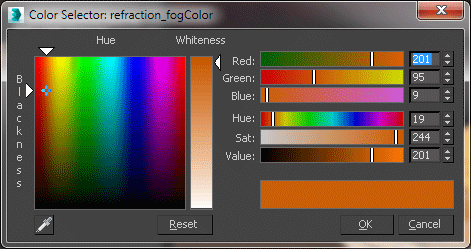
For the Orange Bear material open the Fog Color swatch and select a mid-range red (HSV: 19, 244, 201).
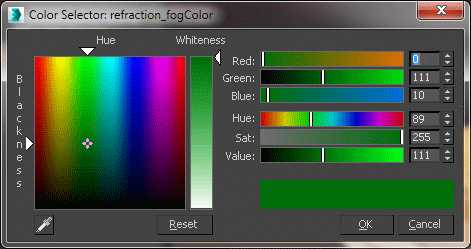
For the Green Bear material open the Fog Color swatch and select a mid-range red (HSV: 89, 255, 111).
Notice how the value of the Fog Color affects how much light passes through the geometry.
The examples below change only the value of the HSV colors in the Fog Color for each material
Value: 29
Value: 168
Value: 249
Change the Fog Color for the Red Bear material back to HSV: 246, 0, 23
Change the Fog Color for the Orange Bear material back to HSV: 201, 95, 9
Change the Fog Color for the Green Bear material back to HSV: 0, 111, 10
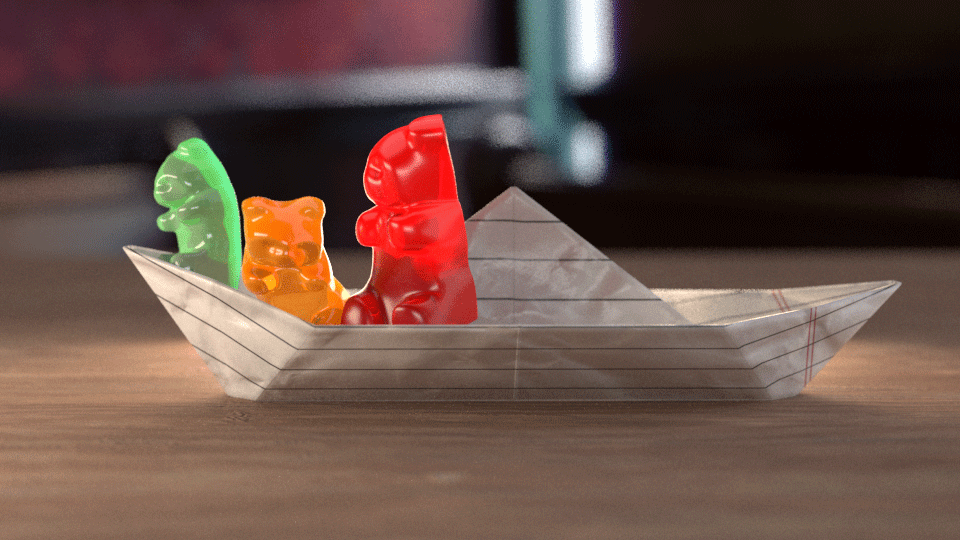
Change the Fog Multiplier to 0.85 for each of the three materials. The closer this number is to 1.0, the more dense the translucent object will appear.

Stylized Translucency
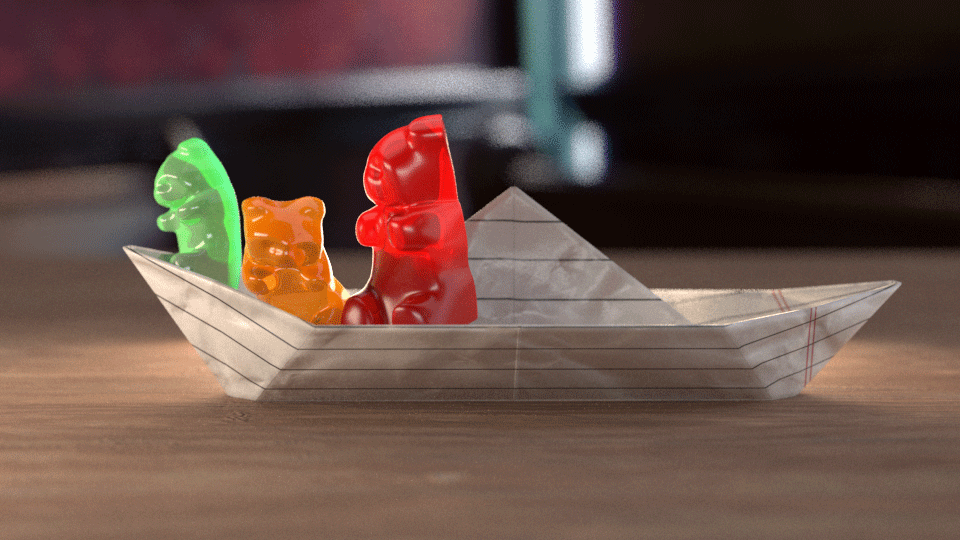
Change the Translucency Type to Hard(wax) on each of the three materials for a more stylized look.
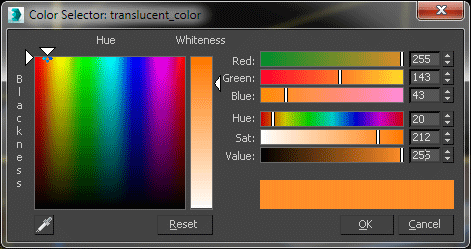
For the Red bear material change the Back-side Color to yellow (HSV: 20, 212, 255), and change the Thickness value to 18.0 cm.
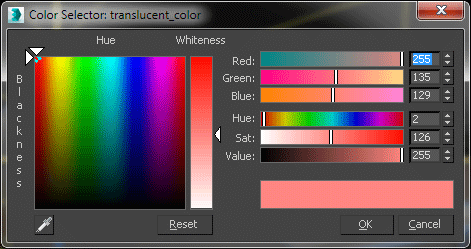
For the Orange Bear material change the Back-side Color to yellow (HSV: 2, 126, 255), and change the Thickness value to 9.0 cm.
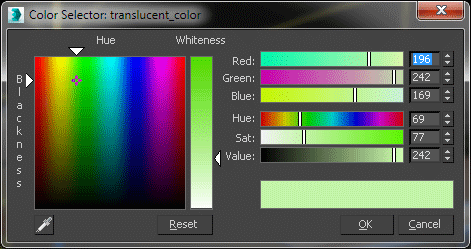
For the Green Bear material change the Back-side Color to yellow (HSV: 69, 77, 242), and change the Thickness value to 9.0 cm.
As the orange and green bears are smaller than the red bear their thickness needs to be smaller to give the same material effects. Make sure the Back-side Color Value is lighter than the Fog Color's Value to get contrast between the two colors. The Back-side Color will be seen on the thinner parts of the geometry.
Red Bear material Back-side color
Orange Bear material Back-side color
Green Bear material Back-side color
Adjust the Fog Bias to -2.5 on the Red Bear material.Adjust the Fog Bias to -2.0 on the Orange Bear material.Adjust the Fog Bias to -2.0 on the Green Bear material.A negative bias adds more contrast to the fog color calculation. This is important in calculating the gradient from the solid body of the geometry to the translucent edges. As the red bear is larger than the other two it requires a slightly different number for the Fog Bias.
The Scatter Coefficient and Fwd/Bck Coefficient describe the direction in which rays travel when interacting with the geometry surface. Change the Fwd/Bck Coeff to 0.0. This will push the translucent effect to the thinner areas of the gummy bears.
Realistic Translucency
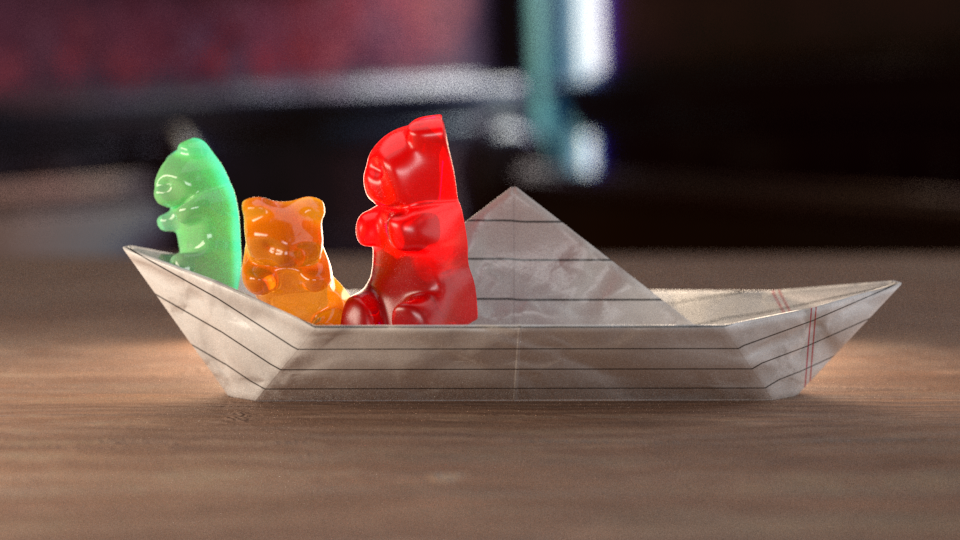
For a more realistic look, the Hybrid Translucency mode should be used. Switch from Hard (wax) to Hybrid mode on all three materials.
Adding the final touches
We willl now use Create a Yellow bears and Purple bears material using the orange bear material as a template. The reason for using the Orange Bear material as our template is due to the red bear being a larger size and thus needing slightly different material settings
-
Duplicate the Orange Bear material twice and name one Yellow Bear and the other Purple Bear.
-
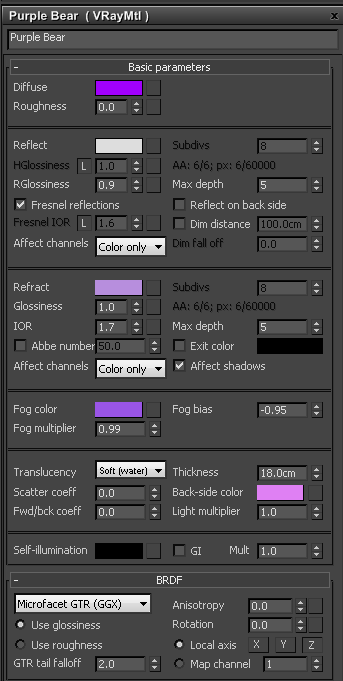
For the Purple Bear material, set the Diffuse color to purple (HSV: 197, 255, 253), The Refract color to a lighter purple (HSV: 192, 291, 221).
-
Set the Purple Bear materials Fog Color to HSV: 190, 161, 231 and the Back-side color to a pink color (HSV: 205, 121, 243) and the Fog bias to -0.95. Set the Thickness to 18.0 cm
-
Set the Diffuse color of the Yellow Bear material to a light yellow (HSV: 36, 101, 255), set the Reflect, Refract and Fog Color to a orangey yellow (HSV: 27, 218, 209). Set the Back-side color to a yellow color (HSV: 40, 227, 199)
Apply a selection of these materials to the remaining bears by unhiding the Bears layer in the Layer Explorer.
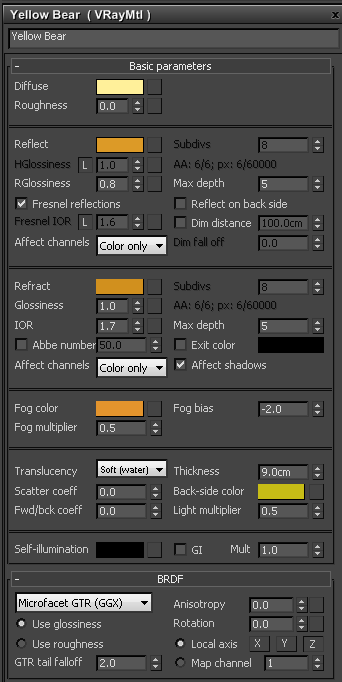
Yellow Bear material
Purple Bear material
Till this point, none of the bear materials have any bump map at all and still look rather artificial. Create a Noise texture with Tiling set to 9.5 for the X, Y and Z channels, Under Noise Parameters change the Noise Type to Fractal. Set the Size to 1.5, and the High to a value of 0.7 with Levels set to 3.0. Name this texture Bears_Surface_Bump. Set Color 1 to a dark grey (HSV: 0, 0, 57), and Color 2 to a light grey (HSV: 0, 0, 176)
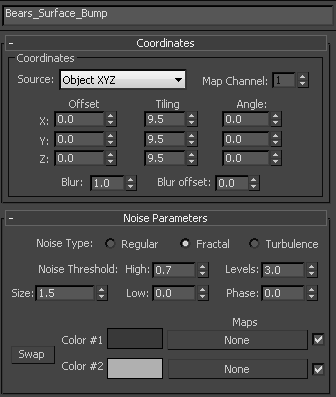
Connect this noise texture to the bump channel of all the different coloured bears materials and set the Bump value to 20.0.
Final render settings
Firstly unhide the Marshmallows and Toothpicks layer in the in the Layer Explorer. Up till now we have been working with the Progressive Image Sampler Type to enable fast preview renders. Now its time to change to the settings for a final render.
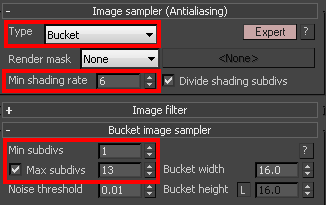
In the V-Ray tab of the Render Setup change the Type to Bucket and ensure that the Min shading rate is set to 6. Under the Bucket image sampler section make sure that the Min subdivs are set to 1 and change the Max subdivs are set to 13.
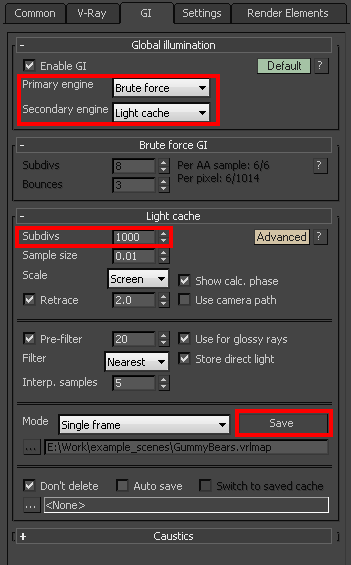
In the GI tab of the Render Setup set the Primary enging to Brute Force and the Secondary engine to Light Cache. Under the Light cache section make sure that the Subdivs are set to a value of 1000. Once you have rendered out the scene using these settings, press the Save button and save out the light cache to a .vrlmap file.
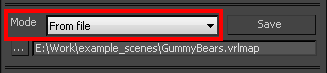
Change the Mode in this section from Single frame to From file setting the file location to the .vrlmap that you have previously saved. This will speed up future renders of the scene.
You can now render out the scene and have a high quality final render.
