Light Cache Settings
This page provides information on the Light cache rollout.
Overview
This section controls and fine-tunes various aspects of the Light Cache. The Light cache rollout appears only when the Light cache method is selected as a Primary engine or Secondary engine on the Global Illumination rollout.
For more details on how the Light cache engine calculates GI, please see the Light Cache GI page under Indirect Illumination.
UI Paths
||Render Setup window|| > GI tab > Light cache rollout
(When Light cache is set as a GI engine)
Default Parameters
The following parameters are visible from the Light cache rollout when set to the Default Render UI Mode.
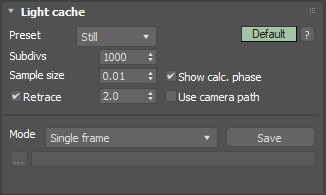
Preset – Offers default Light cache settings for either Still or Animation rendering.
Subdivs – Determines how many paths are traced from the camera. The actual number of paths is the square of the subdivs (the default 1000 subdivs mean that 1,000,000 paths are traced from the camera). For more information, see the Subdivs Parameter example below.
Sample size – Controls the size of the individual light cache samples. For more information, see the Sample Size example below.
Show calc. phase – Enable this option to show the paths that are traced. This does not affect the calculation of the light cache and is provided only as a feedback to the user. This option is ignored when rendering to fields - in that case, the calculation phase is never displayed.
Retrace – Enables retracing of GI near corners. This helps prevent light leaks and flickering. Normally, this should be enabled. The value specifies the extent to which GI near corners are retraced instead of being read from the light cache. A value of 0.0 disables retracing. A value of 2.0 is good for still images, and 8.0 is good for animations. Higher values result in more rays traced at render time. For more information, see the Retrace example below.
Use camera path – When enabled, V-Ray calculates the light cache samples for the entire camera path instead of just the current view, in the same way as this is done for the Fly-through mode. This is useful when rendering animations with moving objects where the camera also moves and the light cache needs to be in Single frame mode. In this case, enabling the Use camera path option helps reducing any flickering, as the GI sample positions on static geometry does not change.
Mode – Determines the rendering mode of the light cache:
Single frame – Computes a new light cache for each frame of an animation.
Fly-through – Computes a light cache for an entire fly-through animation, assuming that the camera position/orientation is the only thing that changes. The movement of the camera in the active time segment only is taken in consideration. Note that it may be better to set Scale to World for fly-through animations. The light cache for the entire animated sequence is computed only at the first rendered frame and is reused without changes for subsequent frames.
From file – The light cache is loaded from a file. The light cache file does not include the prefiltering of the light cache; prefiltering is performed after the light cache is loaded, so that you can adjust it without the need to recompute the light cache.
Progressive path tracing – The light cache algorithm is used to sample the final image progressively.
File – Specifies the file name to load the light cache from, when the Mode is set to From file. Please note that you can also load a light cache by dragging and dropping a .vrlmap file directly in your viewport. Just be aware that doing so loads it for usage immediately, turning GI on, changing its Secondary engine to Light cache and its Mode to From file.
Save – Saves the light cache to a file on disk for later reuse. Note that the Don't delete option must be enabled for this to work. Otherwise, the light cache is deleted as soon as rendering is complete, and it is not be possible to save it.
Example: Subdivs Parameter
The Subdivs parameter controls the number of rays that are shot into the scene and the noise quality of the light cache samples.
Here is a scene rendered with different settings for the Subdivs parameter (all other settings are the same). The Scale option is set to World.
As we add more samples, the noise is reduced, but the render times increase. When the Subdivs parameter is doubled, the light cache takes approximately 4 times longer to calculate.
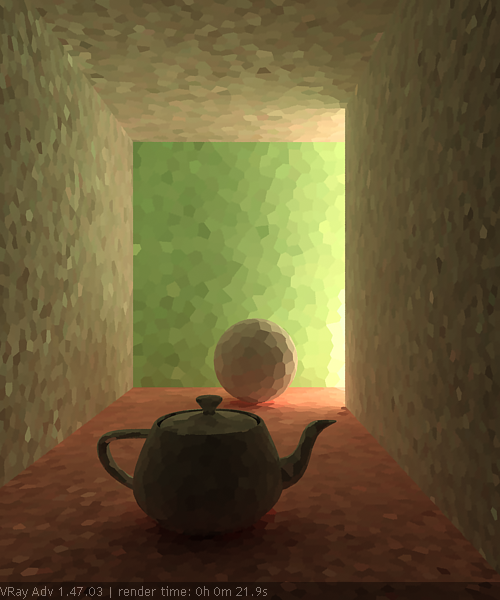
Subdivs = 500
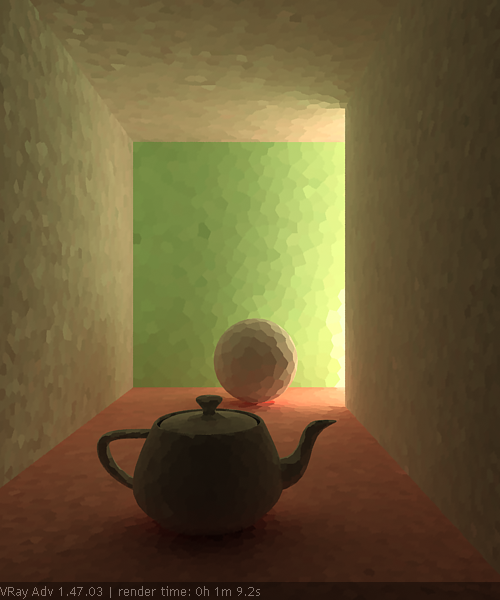
Subdivs = 1000
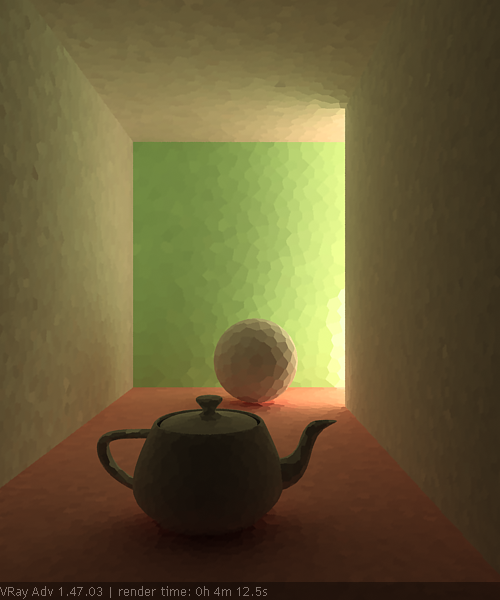
Subdivs = 2000
5002000
Example: Sample Size
The Sample size parameter controls the size of the individual light cache samples. Smaller values produce a more detailed lighting solution, but are noisier and take more RAM. Larger values produce less detail, but take less RAM and may be faster to calculate.
Here is a scene rendered with different values for the Sample size parameter. All other values are the same. Here, the Scale option is set to Screen.
Note the light leak from the wall on the right in the last image. This happens because samples from the other side of the wall are quite large and end up being used on the side facing the camera. Compare with the images rendered in the previous example, where Scale is set to World. Also note the difference in the noise level between the samples.
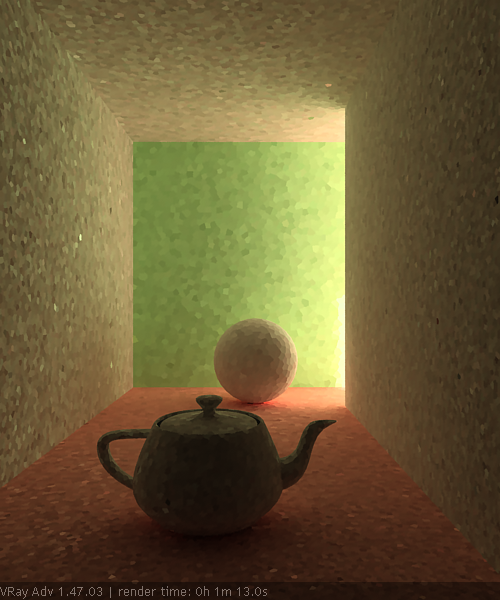
Sample size = 0.01
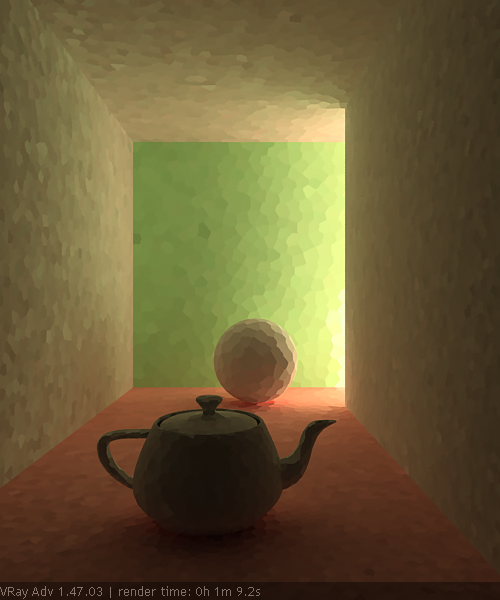
Sample size = 0.02
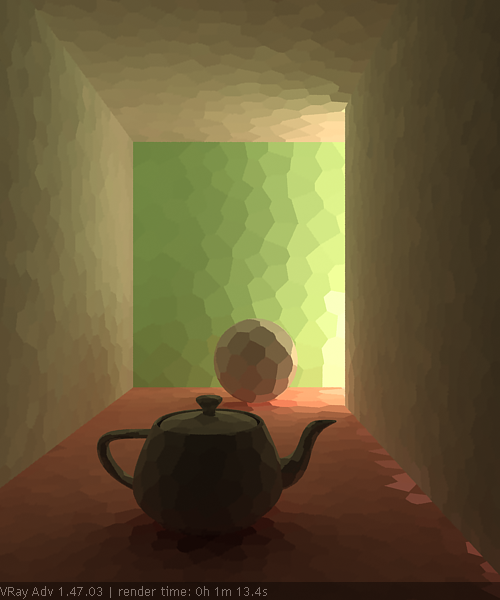
Sample size = 0.0
0.010
Example: Scale
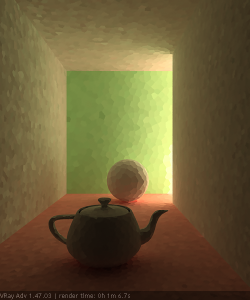
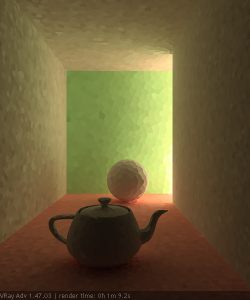
The Scale parameter determines whether the Sample size and Filter size parameters are in Screen space or World space.
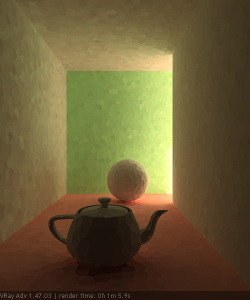
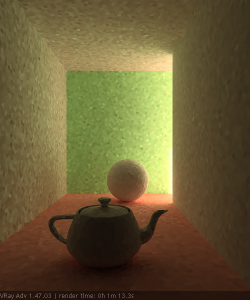
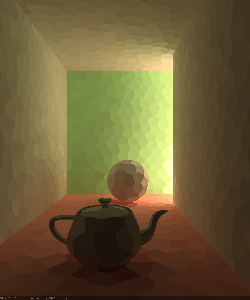
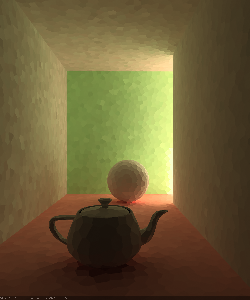
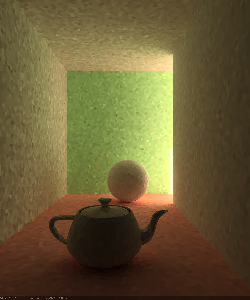
In the table below, the Screen scale was used and the scene was rendered with different image and world sizes. The Sample size was constant for all images (default value 0.02).
As you can see, we always get the same number of light cache samples for all cases, regardless of resolution or scene size. In fact, when scaled to the same size, the images look identical. For this reason, Screen scale is applicable to the large variety of scenes.
Scene scaled down to 50%
Normal scene
Scene scaled up to 200%
Resolution 250x300
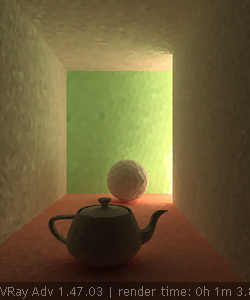
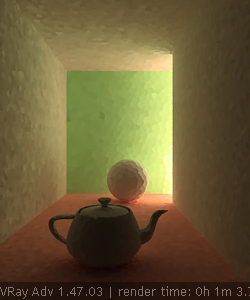
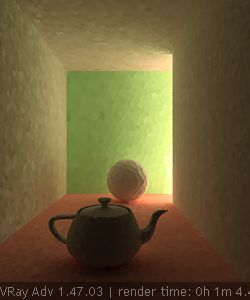
Resolution 500x600
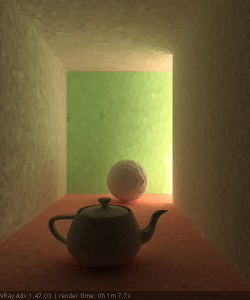
Resolution 1000x1200
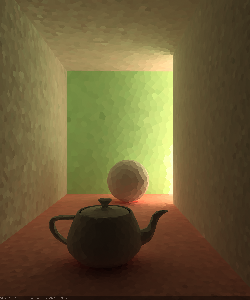
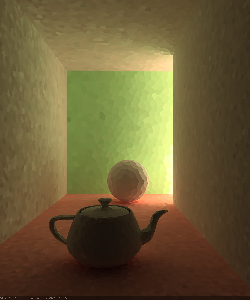
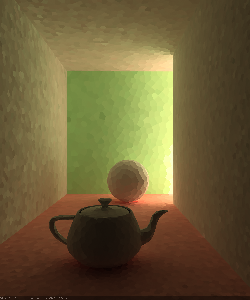
In the table below, the World scale mode was used. Again, the scene is rendered at three different resolutions and scales, but with the same light cache parameters. The sample size was set to be 1/5th of the sphere's radius in the scene at normal scale.
You will notice that the number of samples again does not depend on the image resolution, but it does depend on the scene size.
Also notice how the samples near the camera appear larger because of the perspective. Compare with Screen scale, which compensates for this effect and tries to make samples with more or less equal sizes in the image.
Another thing to note is that we don't get light leaks even when the samples are relatively large, as we did in the Sample Size example. This is because World scale forces a uniform sample size on both sides of the right wall.
Scene scaled down to 50%
Normal scene
Scene scaled up to 200%
Resolution 250x300
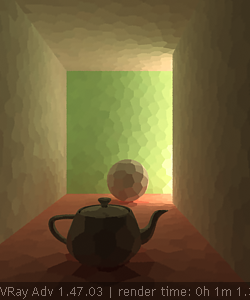
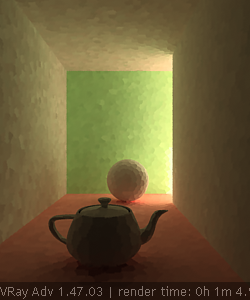
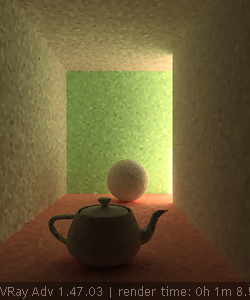
Resolution 500x600
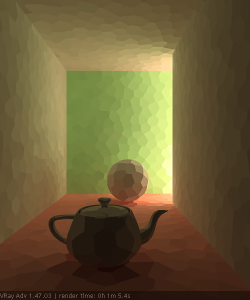
Resolution 1000x1200
Example: Retrace
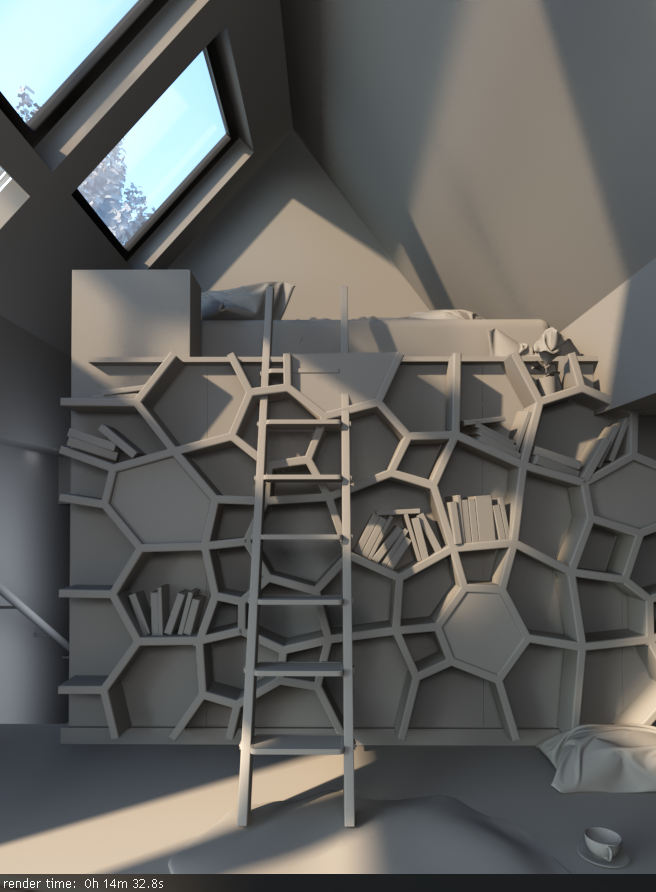
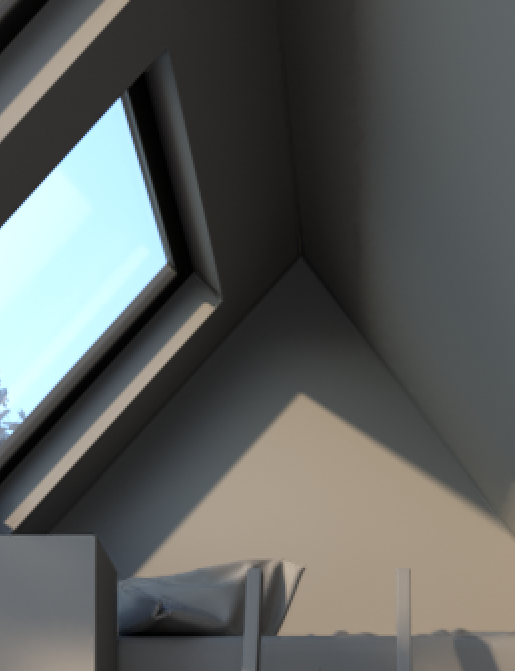
The first set of images shows how the Retrace parameter can be used to reduce light leaks due to the light cache interpolation. The scene is an interior with parts of the exterior visible. For the GI settings, Brute Force is used for primary bounces (it is selected as the Primary engine in the Global Illumination Rollout) and Light cache is the Secondary engine.
The bright light cache samples from the exterior blend with the darker samples from the interior, causing light leaks when the light cache is calculated. The Retrace option (with the default value of 2.0) successfully resolves the problem at the expense of increased calculation time for the light cache.
OffOn
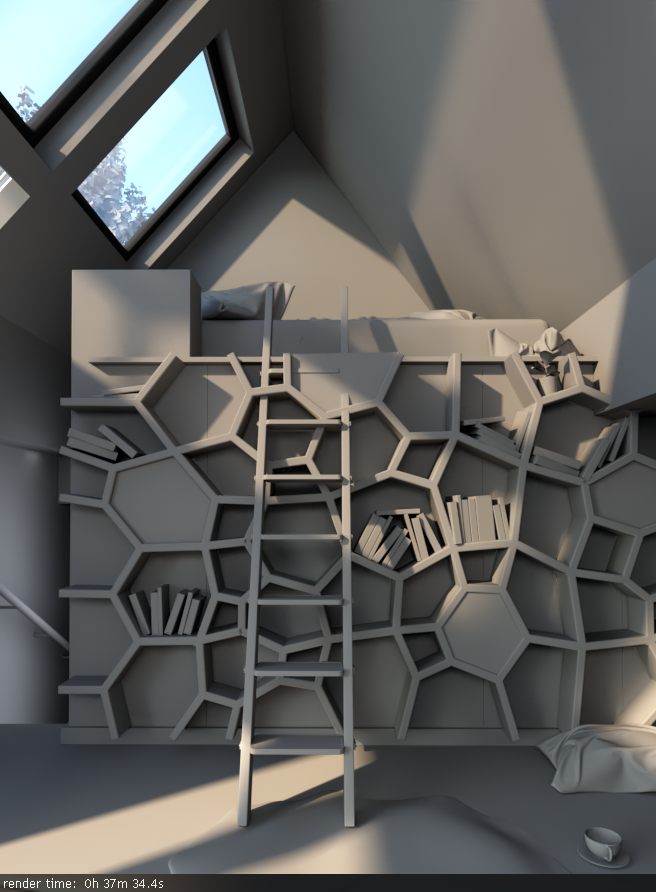
OffOn
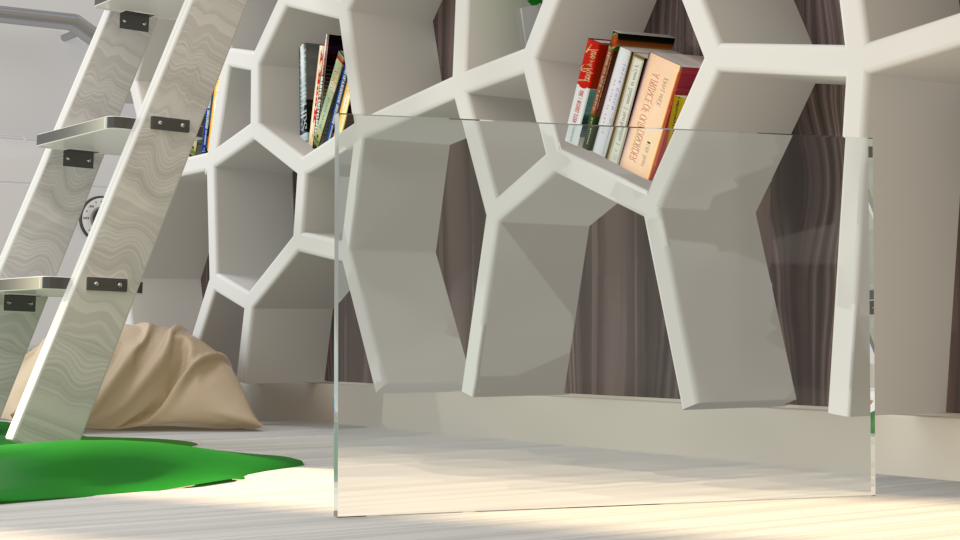
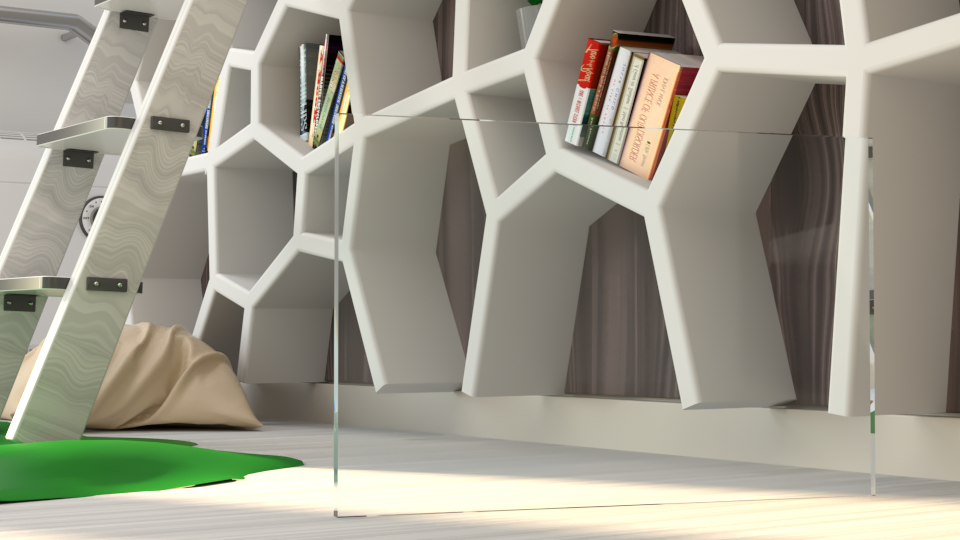
The second scene in this example shows how the Retrace option can be used to improve the appearance of glossy reflections and refractions with the Use for glossy rays option. In this case, V-Ray dynamically decides whether to use the light cache or not, based on the glossiness of the surface and the distance from it.
OffOn
OffOn
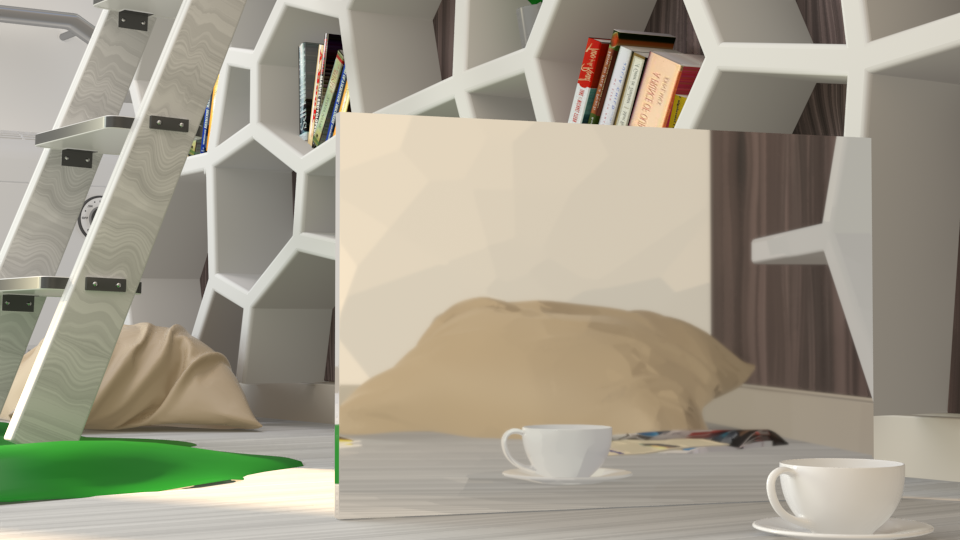
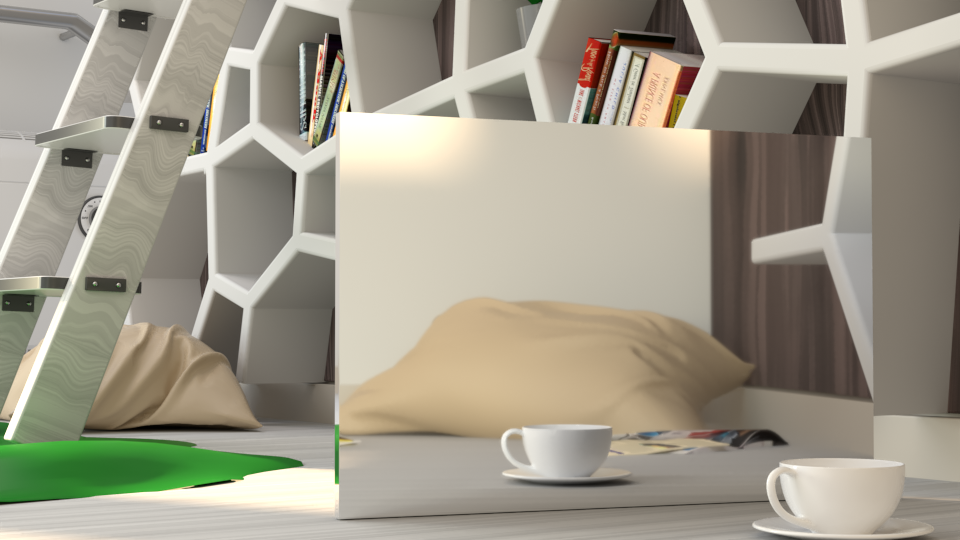
Without retracing, the light cache samples are clearly visible in the glossy reflections and refractions.
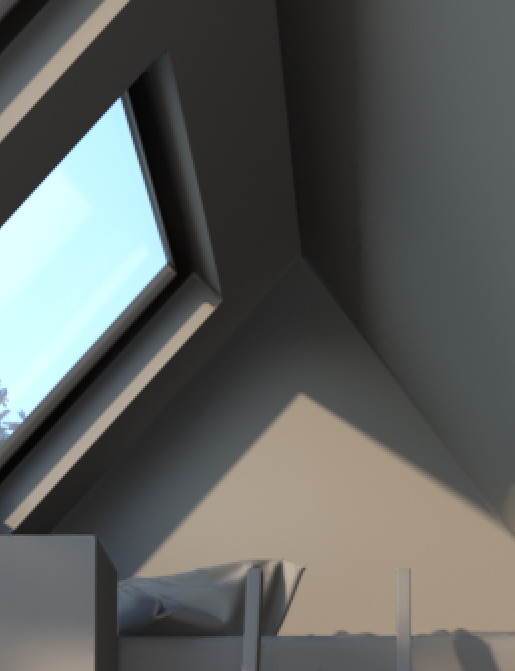
In this third example, when Retrace is turned on, its value determines whether brute force is used instead of light cache near corners or objects that are close together. When the Retrace is greater than 0, only brute force is used which helps give a far more accurate result, although this may slow down rendering. However, if the Retrace value is 0.0, then only the light cache is used and thus retracing is disabled. This is faster but less accurate and more prone to noise and artifacts from light leakage.
If a high value is used for the Retrace, while light leakage and artifacts will disappear, brute force would be used for a larger area and, as a result, the render may appear more noisy. Therefore the default Retrace value of 2.0 is sufficient in most cases.
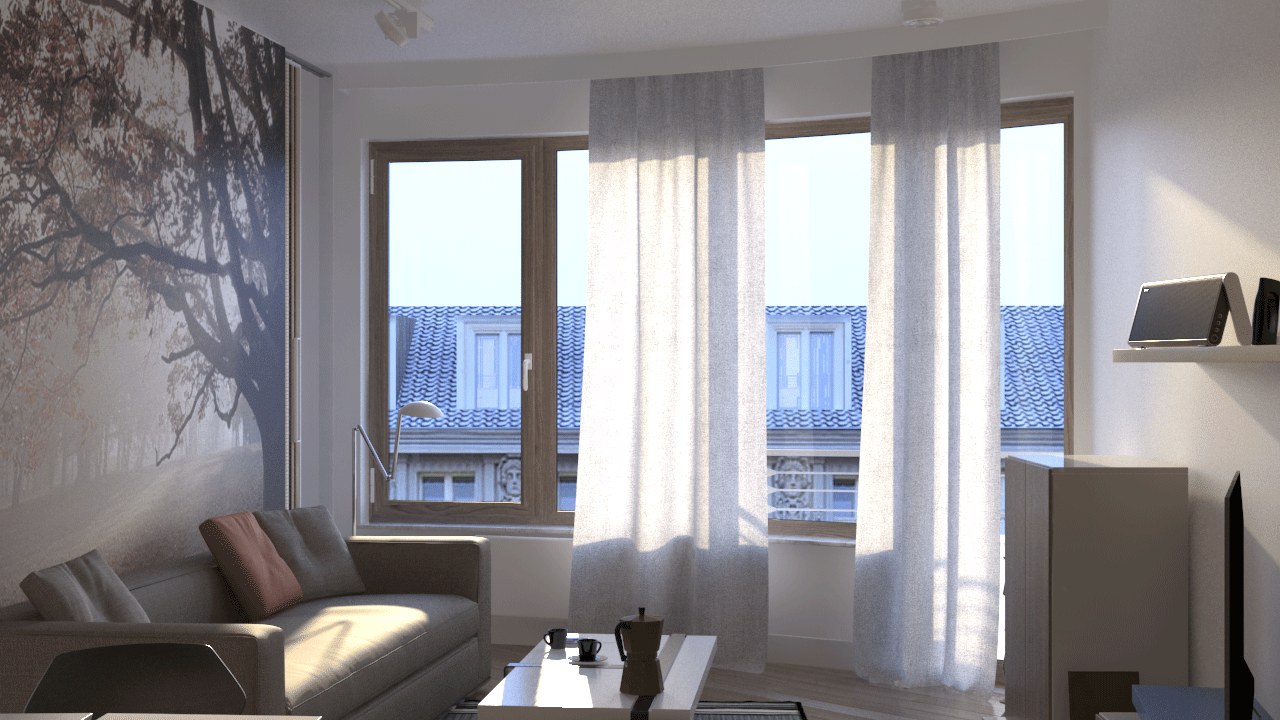
Retrace is turned off.
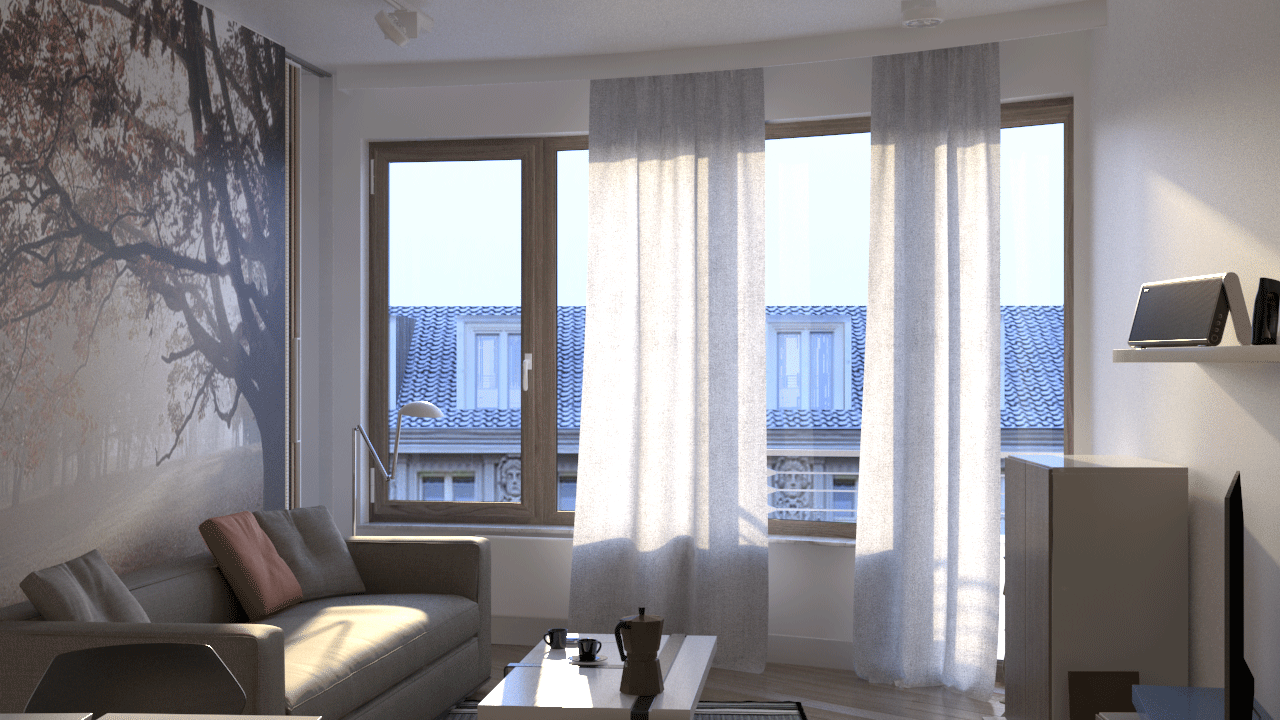
Retrace turned on with a value set to 2.0. Notice how the light leaks above the window disappear and shadows in certain areas appear darker.
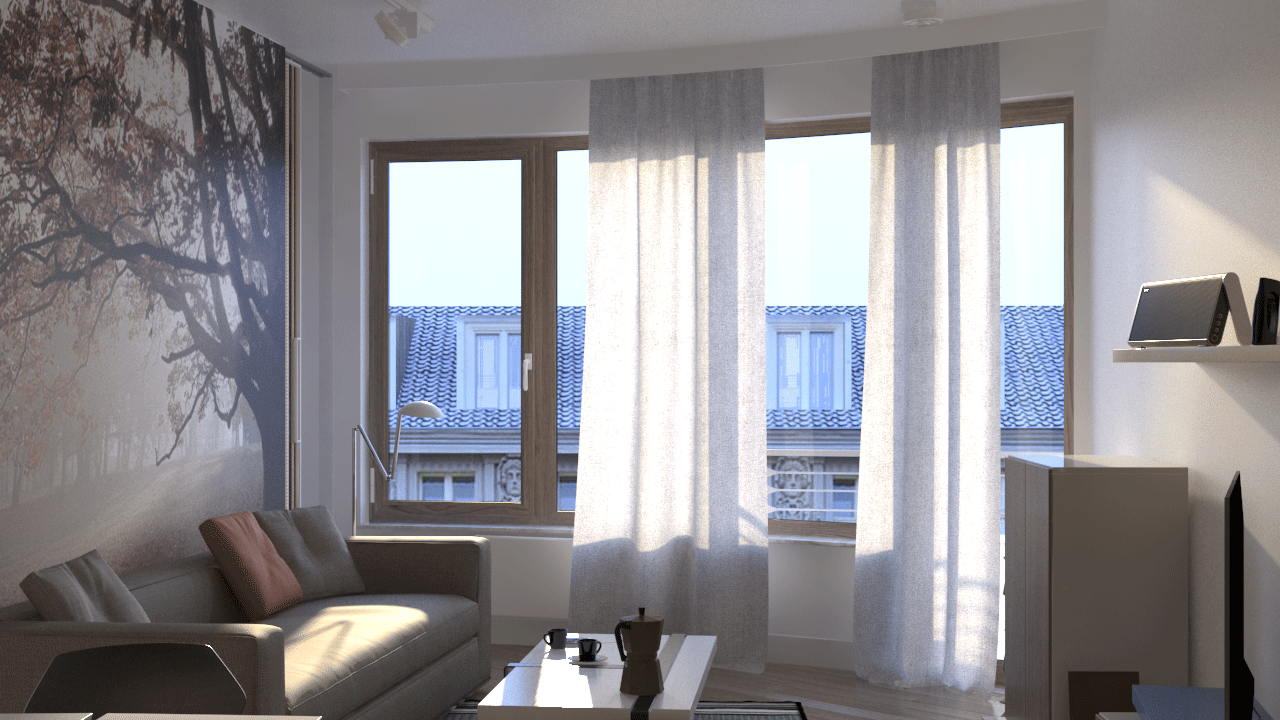
Retrace turned on with a value set to 0.0. As a result only the light cache has been used, which will be faster but produces artifacts near corners or in places where objects are close to each other.
Advanced Parameters
The following parameters are added to the list of visible settings available from the Light cache rollout when set to the Advanced Render UI Mode.
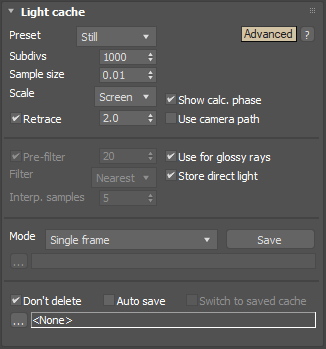
Scale – Determines the units of the Sample size. For more information, see the Scale example below.
Screen – The units are fractions of the final image (a value of 1.0 means the samples are as large as the whole image). Samples that are closer to the camera are smaller, and samples that are far away are larger. Note that the units do not depend on the image resolution. This value is best suited for stills or animations where the light cache needs to be computed at each frame.
World – The sizes are fixed in world units everywhere. This can affect the quality of the samples - samples that are close to the camera are sampled more often and appear smoother, while samples that are far away are noisier. This value might work better for fly-through animations, since it forces constant sample density everywhere.
Pre-filter – When enabled, the samples in the light cache are filtered before rendering. Note that this is different from the normal light cache filtering controlled by the Filter parameter, which happens during rendering. Prefiltering is performed by examining each sample in turn, and modifying it so that it represents the average of the given number of nearby samples. More prefilter samples mean a blurrier and less noisy light cache. Prefiltering is computed only once after a new light cache is computed or loaded from disk.
Use for glossy rays – When enabled, the light cache is used to compute lighting for glossy rays as well, in addition to normal GI rays. This can speed up rendering of scenes with glossy reflections quite a lot. When you use this option, it is recommended to also enable the Retrace threshold option, which prevents the light cache from being visible in very glossy surfaces.
Filter – Determines the type of render-time filter for the light cache. The filter determines how irradiance is interpolated from the samples in the light cache.
None – No filtering is performed. The nearest sample to the shaded point is taken as the irradiance value. This is the fastest option, but it might produce artifacts near corners if the light cache is noisy. You can use the Pre-filter setting to decrease the noise. This option works best if the light cache is used for secondary bounces only, or for testing purposes.
Nearest – Looks up the nearest samples to the shading point and averages their value. This filter is not suitable for direct visualization of the light cache, but is useful if you use the light cache for secondary bounces. A property of this filter is that is adapts to the sample density of the light cache and is computed for a nearly constant time. The Interpolation samples parameter determines how many of the nearest samples to look up from the light cache.
Fixed – Looks up and averages all samples from the light cache that fall within a certain distance from the shaded point. This filter produces smooth results and is suitable for direct visualization of the light cache (when it is used as the primary GI engine). The size of the filter is determined by the Filter size parameter. Larger values blur the light cache and smooth out noise. Typical values for the Filter size are 2-6 times larger than the Sample size. Note that Filter size uses the same scale as the Sample size, and that the units used depends on the Scale parameter.
Store direct light – When enabled, the light cache also stores and interpolates direct light. This can be useful for scenes with many lights when either irradiance map or direct GI (brute force) method is used for the primary diffuse bounces, since direct lighting is computed from the light cache instead of sampling each and every light. Note that only the diffuse illumination produced by the scene lights is stored. If you want to use the light cache directly for approximating the GI while keeping the direct lighting sharp, disable this option.
Interp. samples – Specifies the number of light cache samples to blend together when the Filter type is set to Nearest. Larger values take longer to compute during the rendering phase.
Don't delete – When enabled (the default), the light cache remains in memory after the rendering. Disable this option to automatically delete the light cache (and thus save memory).
Auto save – When enabled, the light cache is automatically written to the specified file. Note that the light cache is written as soon as it is calculated, rather than at the actual end of the rendering.
To save a separate Light Cache file for each frame of an animation, append %04d suffix to the name of the file.
Switch to saved cache – When enabled, after the rendering is complete, the light cache Mode is automatically set to From file and the name of the auto-saved light cache file is copied to the File parameter.
Expert Parameters
The following parameters are added to the list of visible settings available from the Light cache rollout when set to the Expert Render UI Mode.
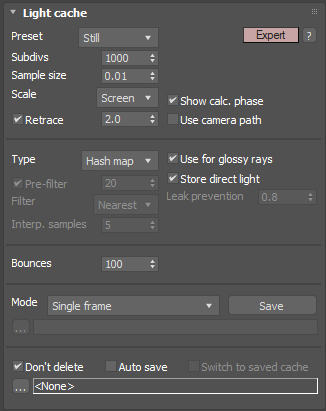
Type – Specifies which method to use to calculate the Light cache.
Hash map –
This is the default light cache type for new scenes. It is a
new light cache implementation that is simpler and produces less flickering in animations.
KD tree –
The original light cache implementation. Old light cache files can use only this method.
Leak prevention – Enables additional calculations to prevent light leaks and reduce flickering with the light cache. A value of 0.0 disables the leak prevention. The default value of 0.8 should be adequate for most cases.
Bounces – Controls the maximum number of secondary bounces that a ray of light may make. Note that this value is an upper limit.
Avoiding flickering in animations
Since the light cache is a biased GI solution, it can introduce some unwanted flickering in animations. Below are some tips to reduce this effect.
-
For flickering due to an animated camera, for short camera moves, an easy fix is to enable the Use camera path option. To remove flickering for longer camera moves where the camera is the only animated part of the scene, precalculate the light cache using Fly-through mode and then use the saved cache for the entire animation.
-
For interior renders or other complicated lighting situations, increasing the light cache Subdivs parameter will make the light cache smoother and more accurate; values around 2000 or 3000 typically work well.
-
The Retrace option helps to reduce light leaks and flickering. For animations, a value of 8.0 works well.
-
Prefiltering also smooths the light cache and reduces flickering. A Pre-filter value of 20 works well.
Following the above, some suggested settings could look like this:
For animations where the only moving object is the camera, enable the Use camera path option, or precalculate the light cache for the entire animation using the Fly-through mode.
For animations with moving objects and/or moving camera:
-
If the camera is moving at relatively small distances (f.e. within a single room of an interior render), enable the Use camera path option.
-
Set the Subdivs parameter to 3000, Sample size to 0.01, Prefilter enabled and Prefilter samples to 20, Retrace enabled and Retrace threshold to 8.0.
Notes
-
Do not set the Adaptive amount in the Global DMC rollout to 0.0 when using the light cache, as this will cause excessive render times.
-
Do not apply perfectly white or near-white materials to the majority of the objects in the scene, as this will cause excessive render times. This is because the amount of reflected light in the scene will decrease very gradually and the light cache will have to trace longer paths. Also avoid materials that have one of their RGB components set to maximum (255) or above.
-
If you want to use the light cache for animation, you should choose a large enough value for the Filter size in order to remove the flickering in the GI.
-
There is no difference between light caches computed for primary bounces (direct visualization) and for secondary bounces. You can safely use light caches computed in one of these modes for the other.
-
Similar to the photon map, you can get "light leaks" with the light cache around very thin surfaces with substantially different illumination on both sides. Sometimes it might be possible to reduce this effect by assigning different GI Surface ID's to the objects on both sides of the thin surface (see the Object settings window); the effect can also be reduced by decreasing the Sample size and/or the filtering.
-
The Light Cache calculation cannot be distributed among several machines for distributed rendering.
-
An alternative way of loading a light cache is by dragging and dropping a .vrlmap file directly in your viewport. Just be aware that doing so will load it for usage immediately, turning GI on, changing its Secondary engine to Light cache and its Mode to From file.