Basic Texture Baking with V-Ray
This page provides a tutorial for texture baking with V-Ray.
Overview
In this tutorial, we discuss the process of texture baking with V-Ray.
Rendering to texture, or "texture baking,” creates texture maps based on an object's appearance in the rendered scene, including any lighting variations over the object such as highlights and shadows. The idea is that these variations in lighting are “baked” into the texture and become part of the texture's coloration. Then all light sources are removed from the scene, and the baked texture is reapplied to the same object as part of a self-illuminated material. The result is an object that still appears to be lit by scene lighting, without the overhead of calculating the effects of light sources on objects in the scene.
The advantage of using baked textures is that real-time display is much faster, since the effects of light sources don't have to be calculated. Such textures are ideal for displaying the textured object rapidly on Direct3D devices such as graphics display cards or game engines. The fact that there's no actual lighting in the scene can sometimes become obvious when the camera or objects move and the lighting displayed on the texture doesn't respond as expected, but during fast game play this distraction is minimal and well worth the time savings gained by using baked textures.
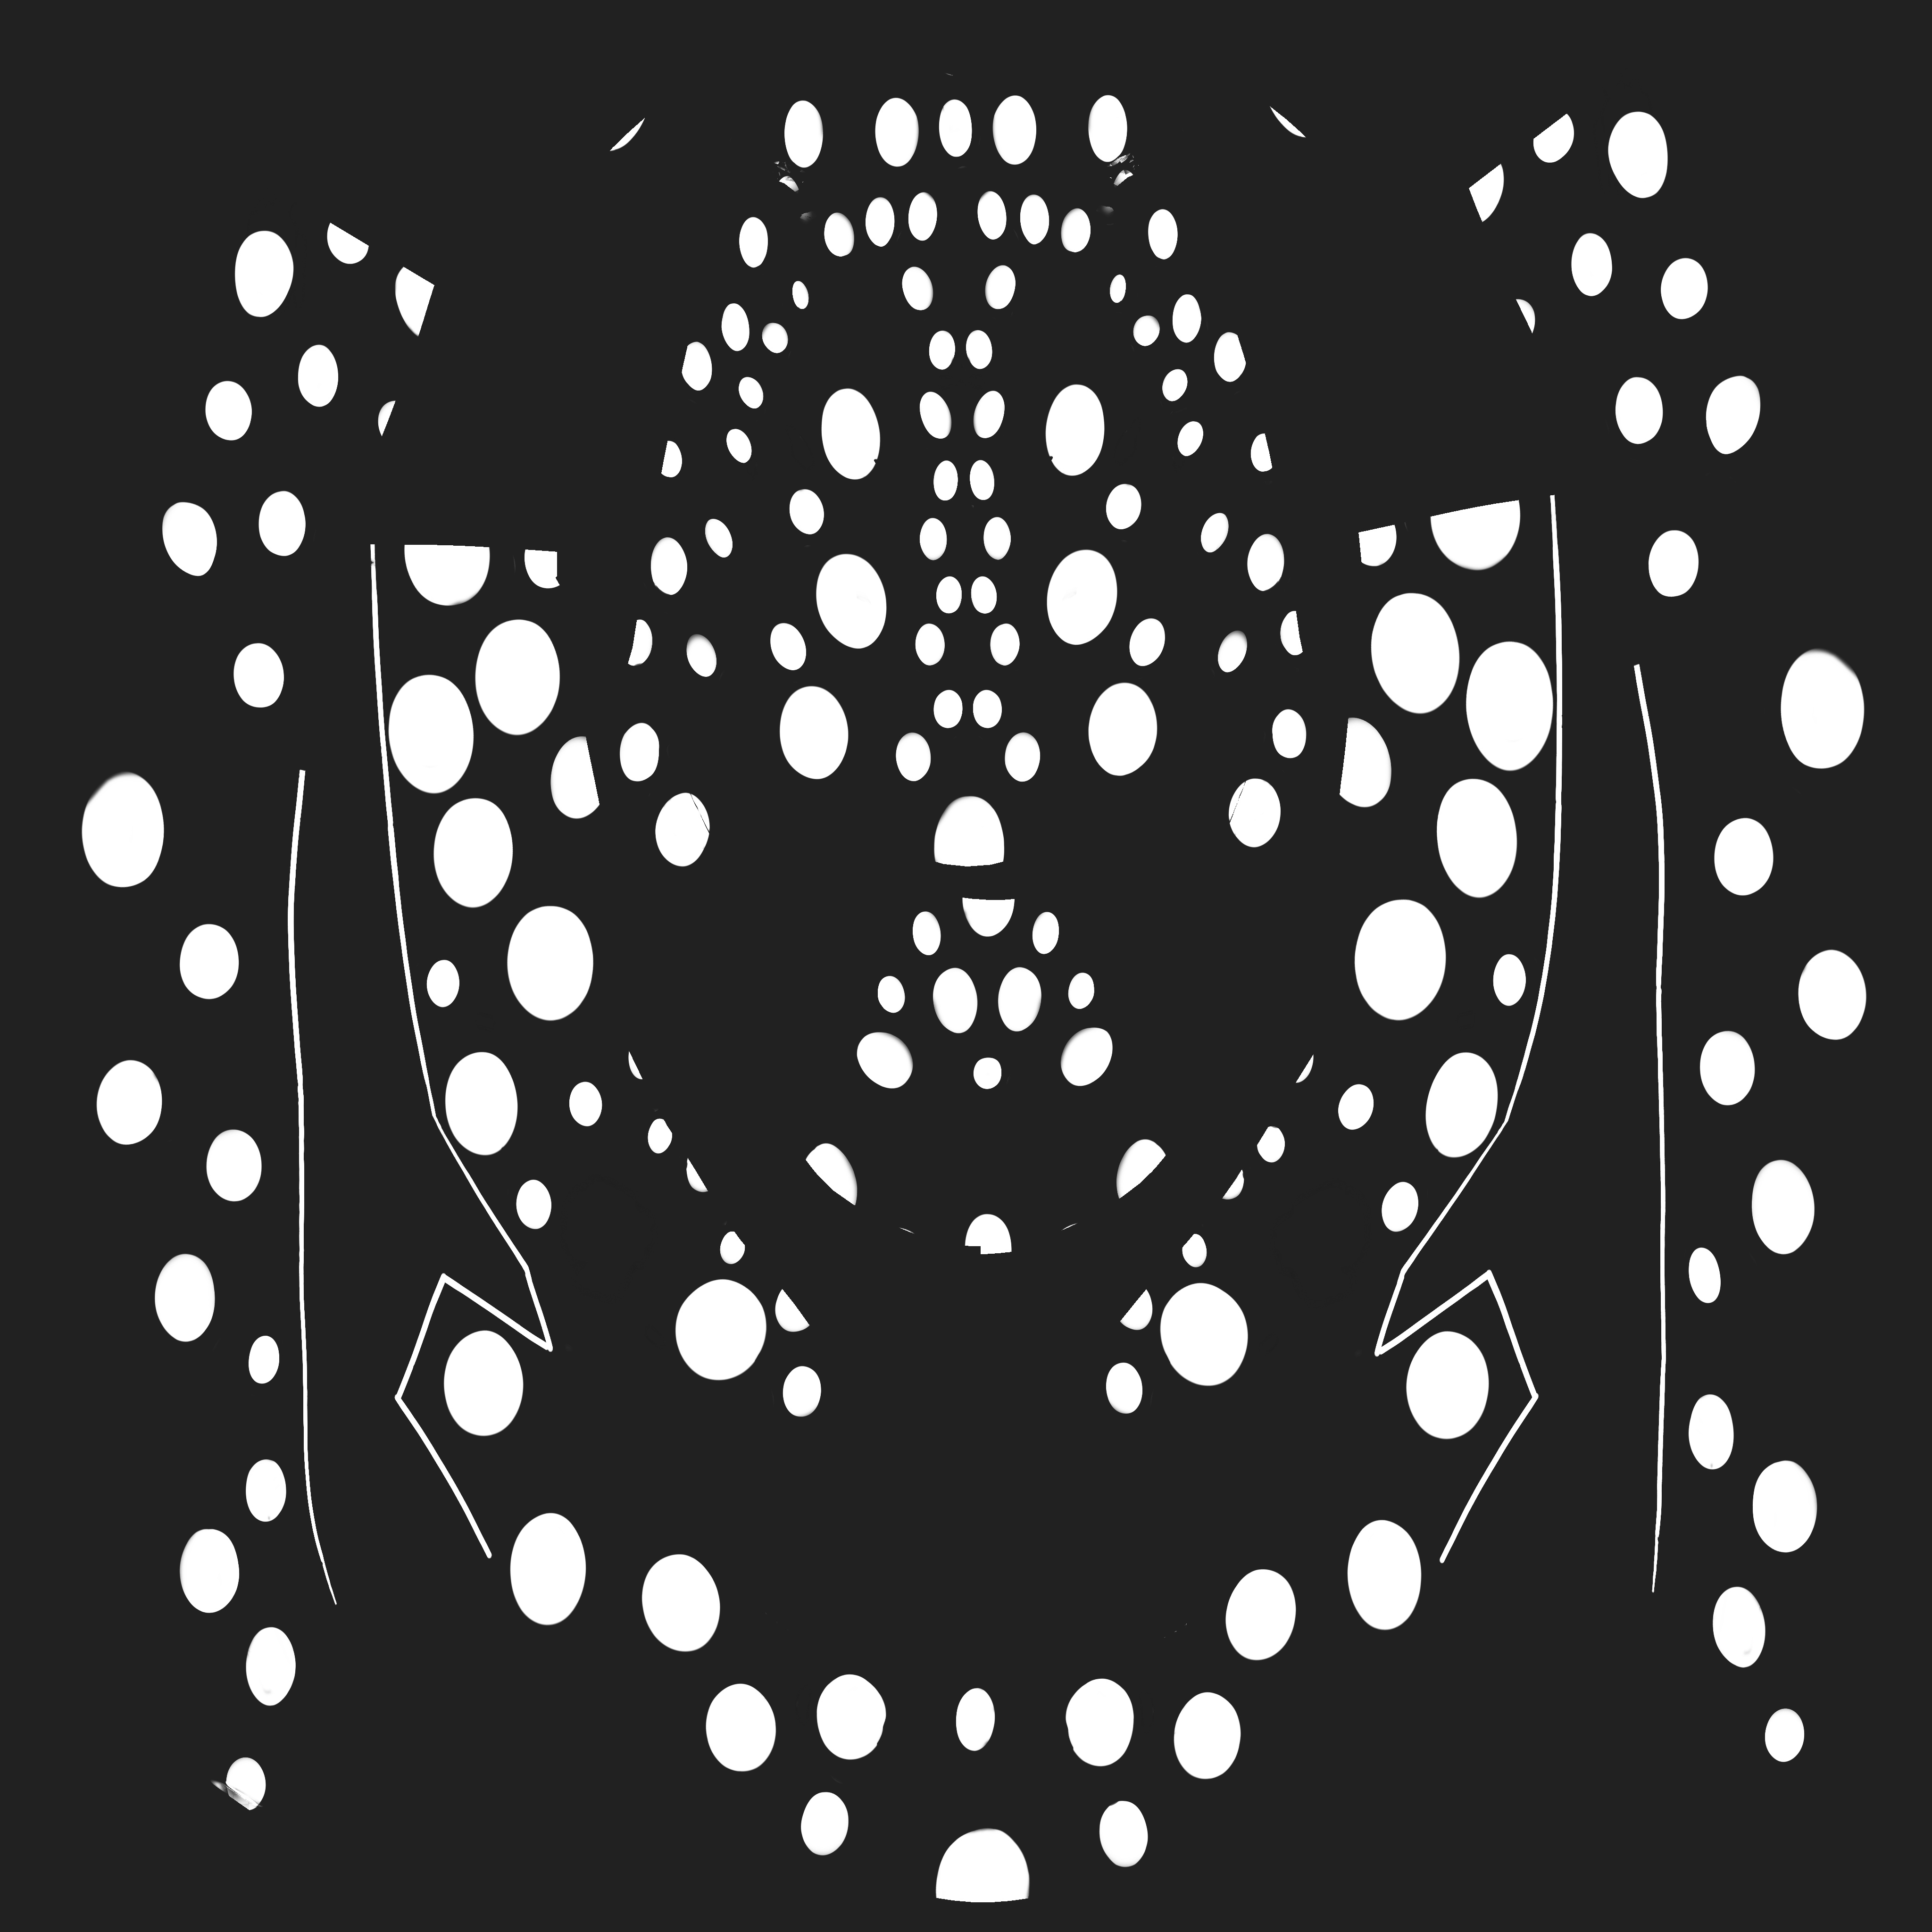 Original Diffuse texture prior to baking.
Black background color is uniform over the entire texture,
and all white dots are uniformly white.
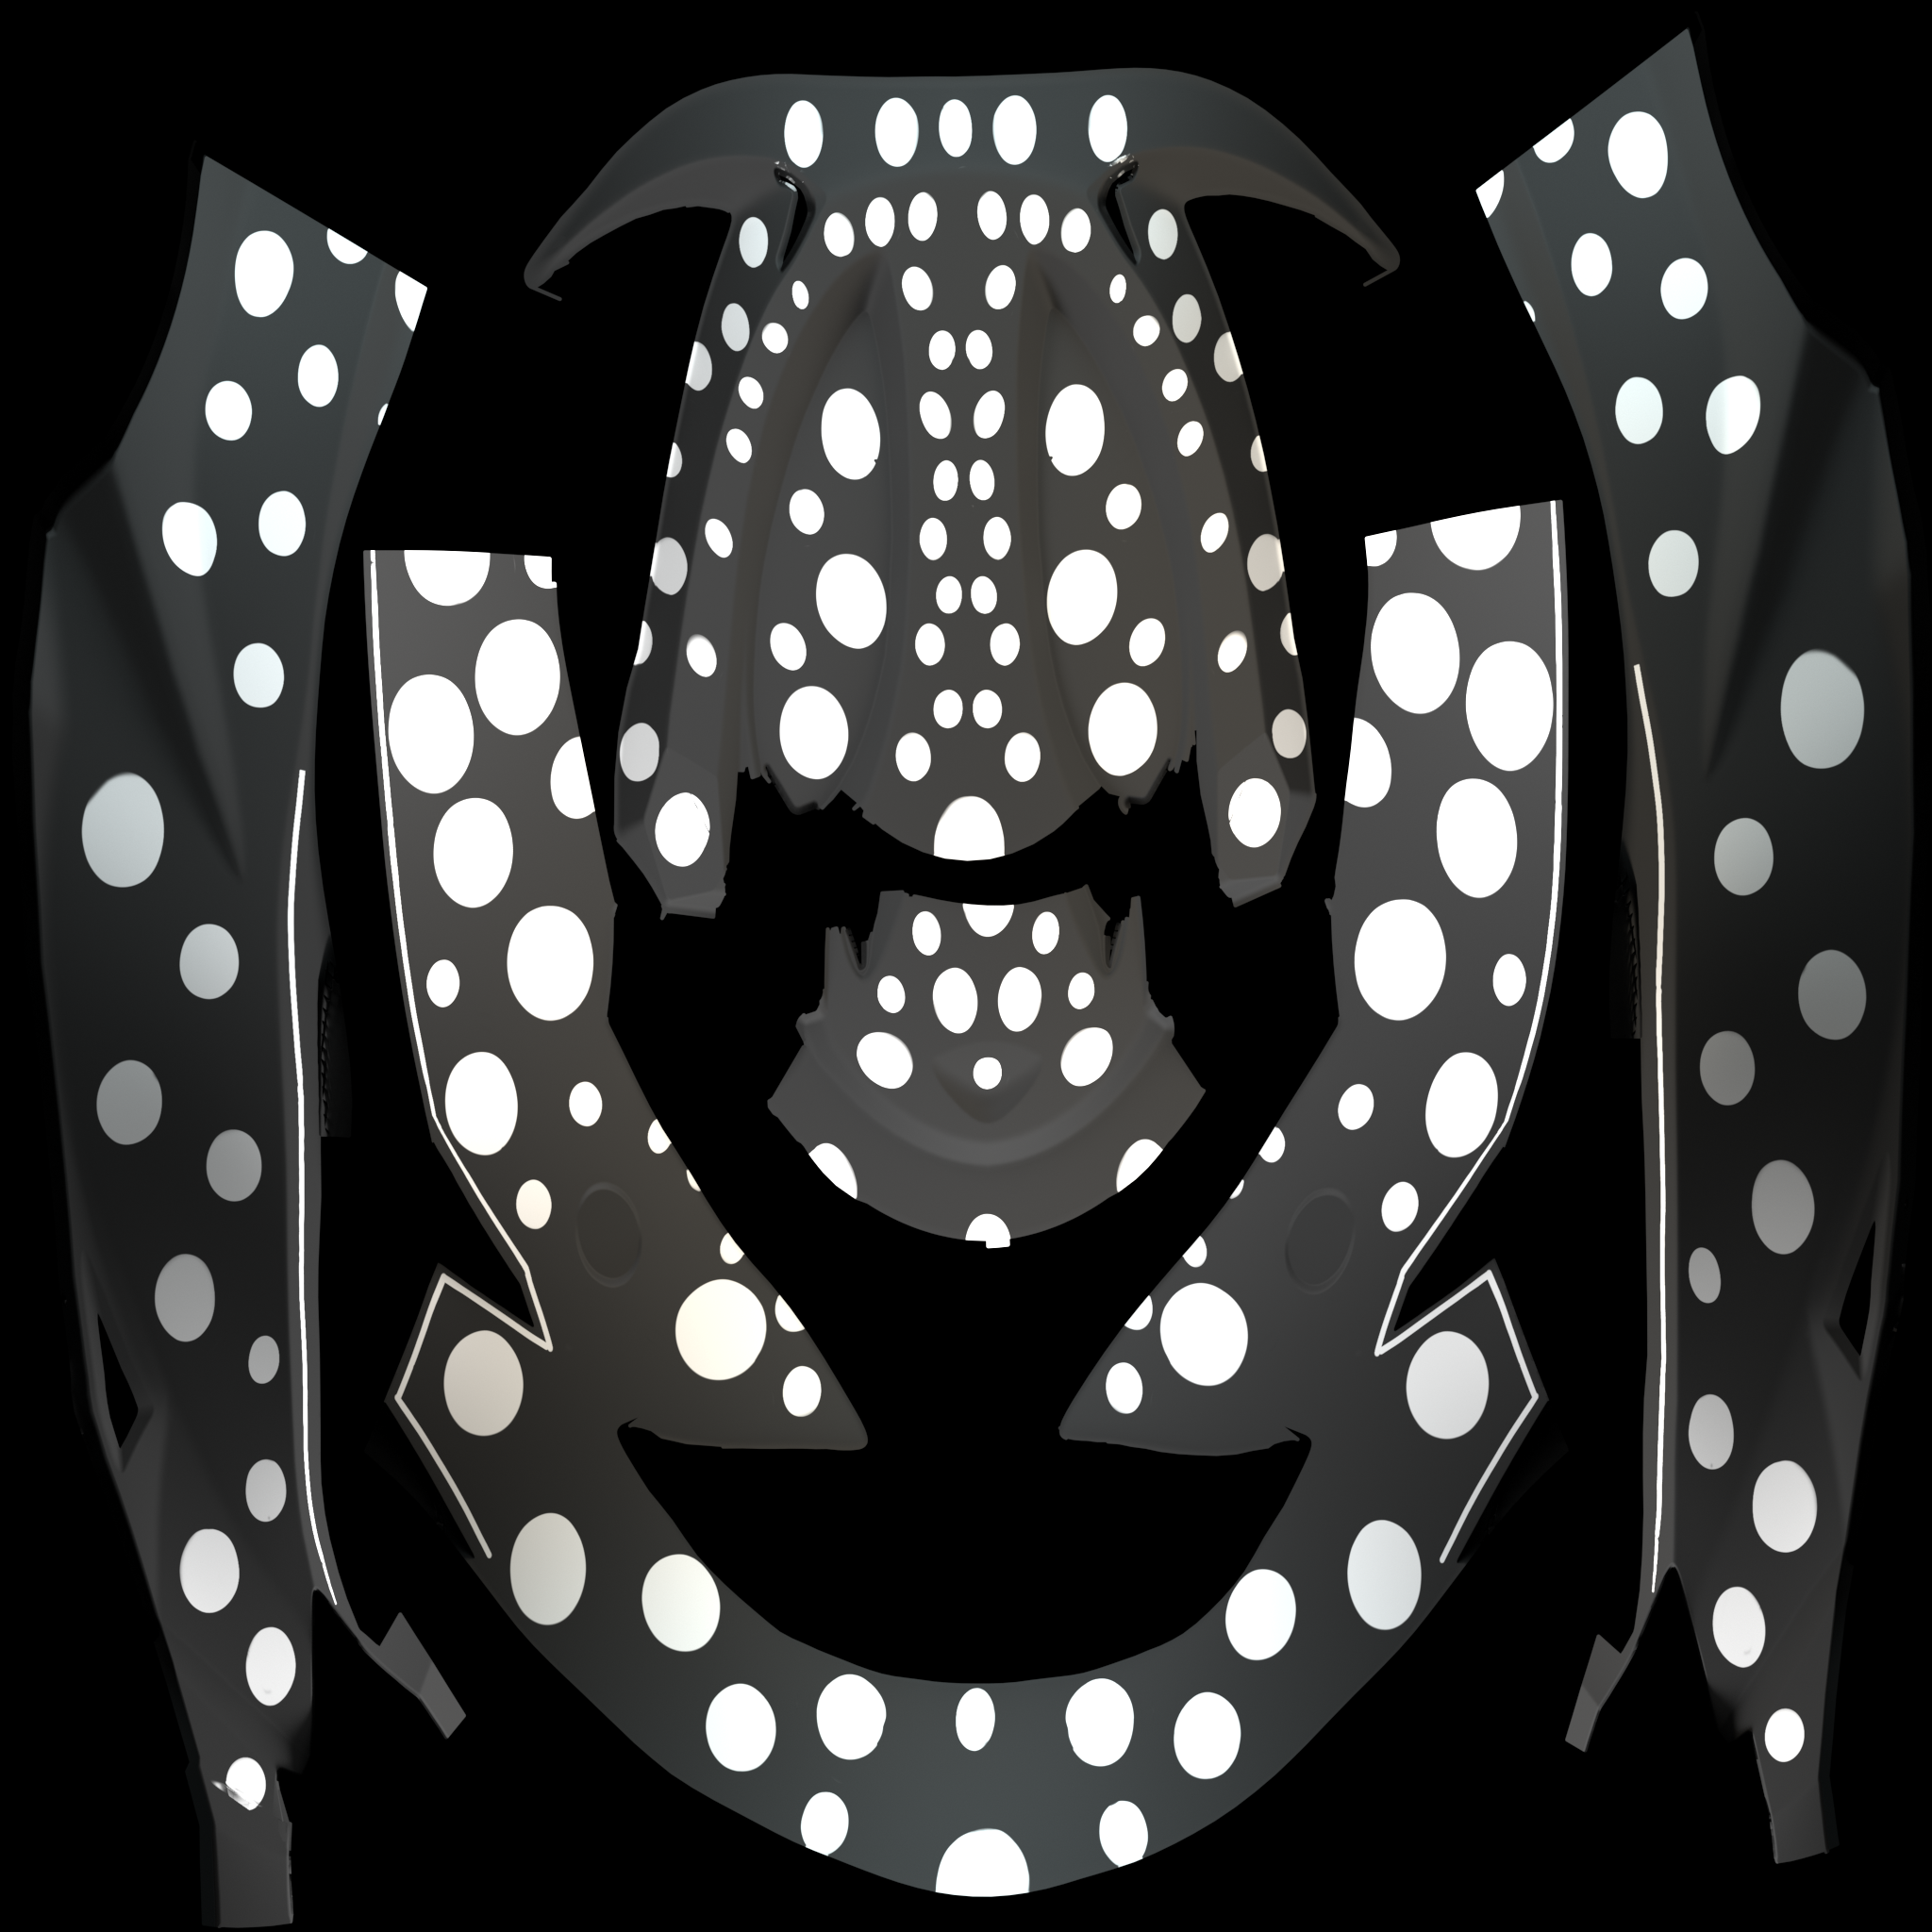 Diffuse texture after baking.
Note the subtle differences in shading over different parts of the texture
due to scene lighting on the object to which the texture was applied.
 Rendering with original Diffuse texture prior to baking, using scene lighting.
 Rendering with Diffuse texture after baking.
Material is self-illuminated; scene has no lighting.
Reflections will not be baked into the VRayCompleteMap due to the fact that they change depending on the camera position.
Tutorial Assets
To download the scene used in this tutorial, click on the button below.
You can right-click the download button and choose " Save Link As... " or " Save target as.. " depending on your browser. This will bring up a dialog to save the zip file without having to wait for the Preview mode to load.
Part I: Setting up the Render
In this first section, we set up and adjust the V-Ray render settings. The goal is to produce lighting and shadows that are suitable for texture baking.
Set up the scene
-
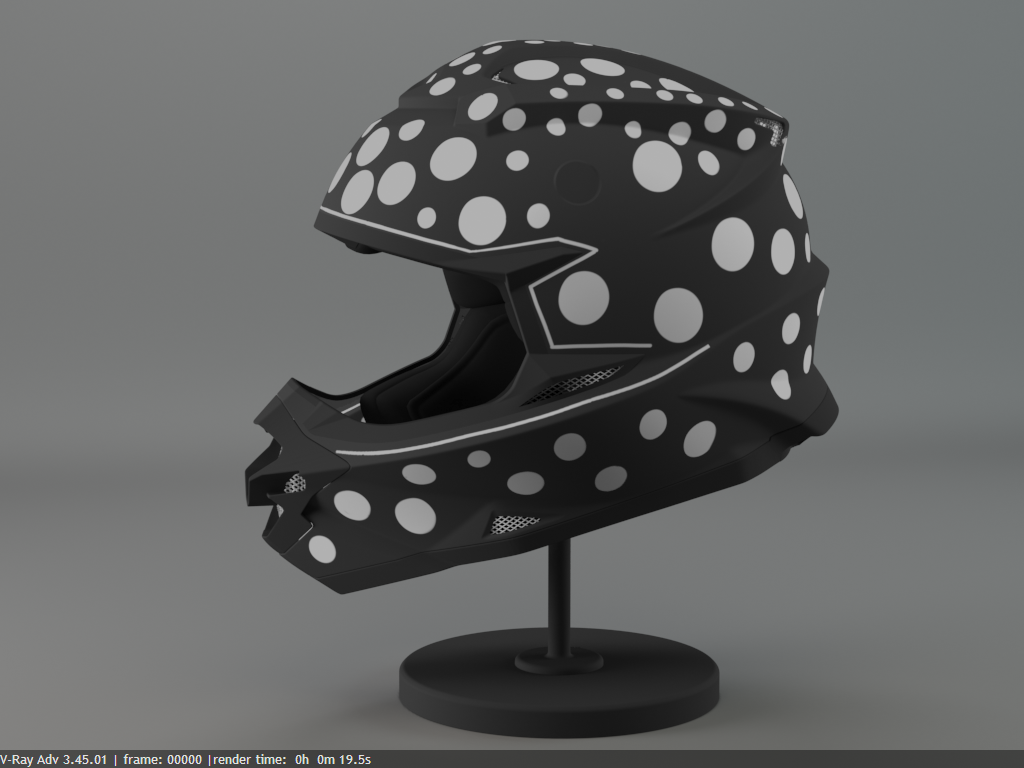
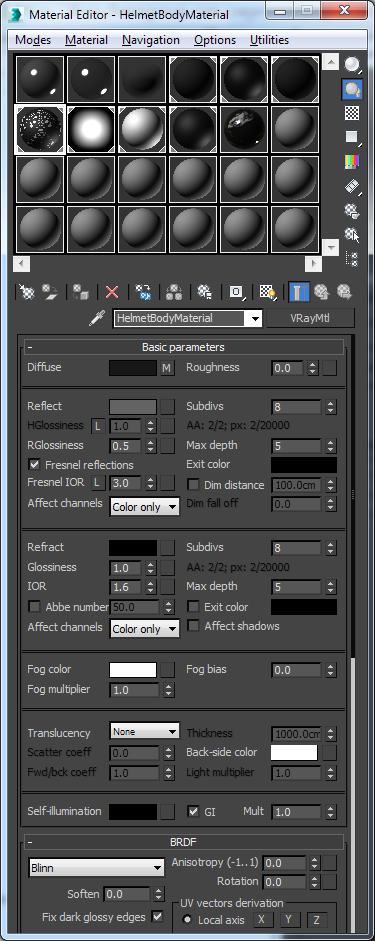
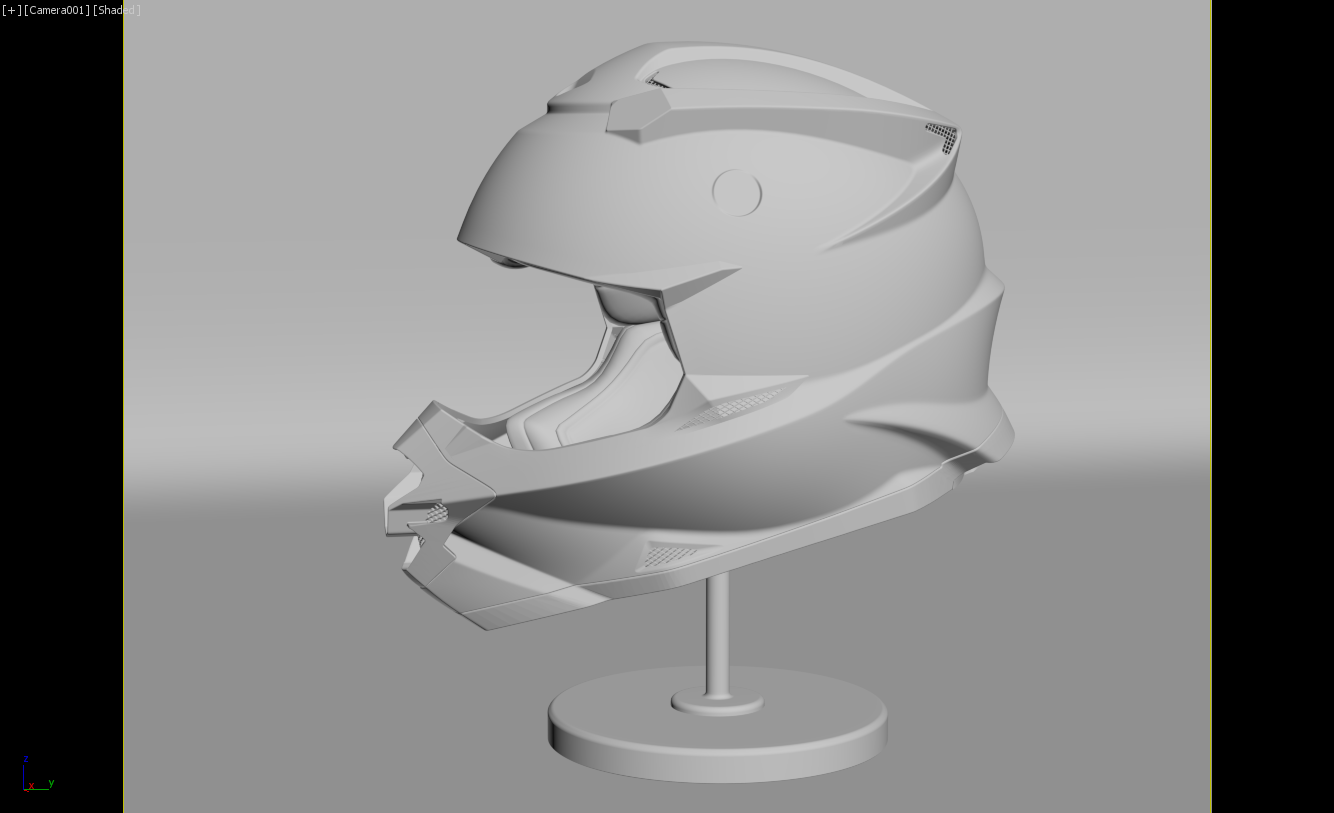
Open the starting scene. It contains a number of objects (the parts that make up the helmet, the stand and the ground) and 4 light sources (4 V-Ray Plane lights). V-Ray materials are assigned to all objects that make up the helmets.
The light sources are situated to the left and right of the helmet, with two further lights above . The light to the right of the helmet has a Multiplier of 10.0, the light to the left of the helmet has a Multiplier of 20.0, and the two lights above have Multipliers of 15.0 and 5.0 respectively. The light to the left has a VRaySoftbox texture applied to it.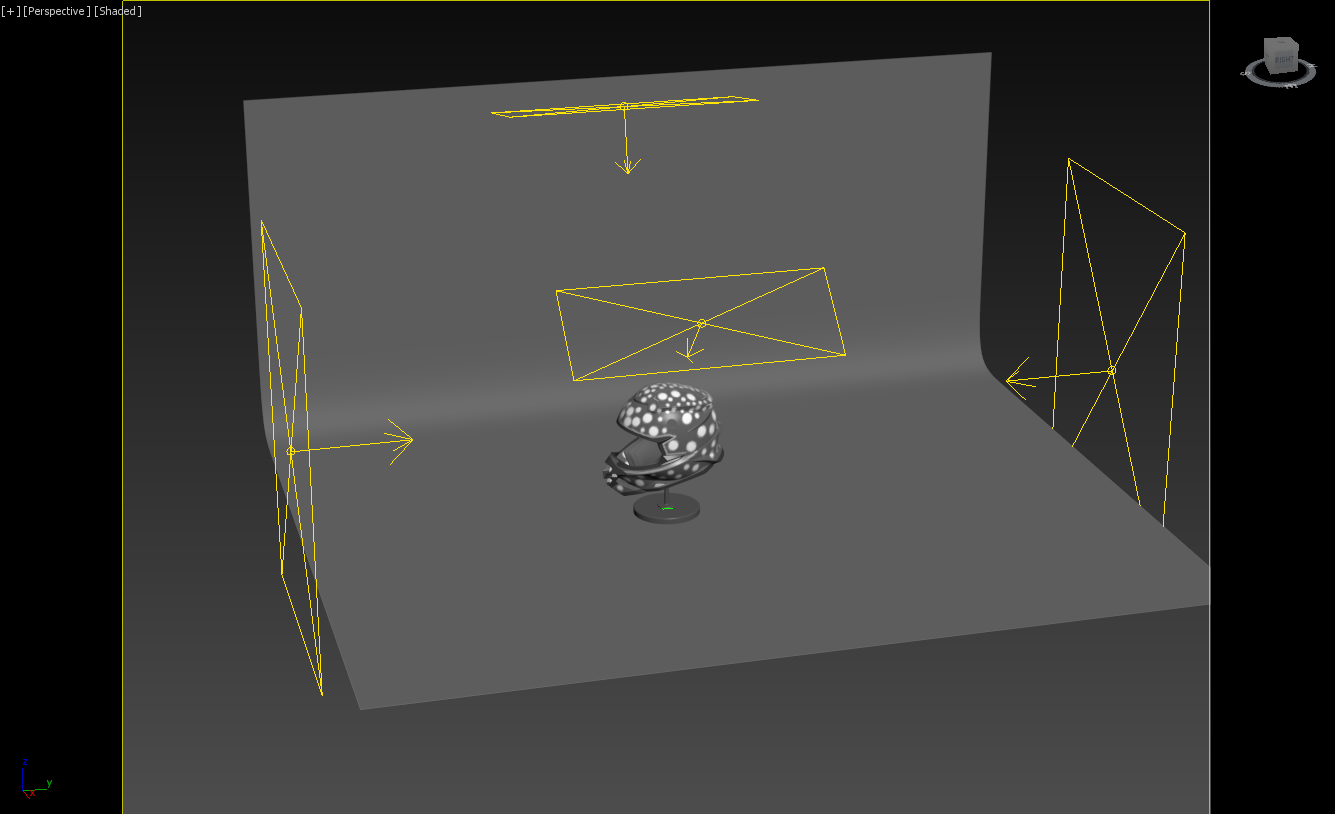
-
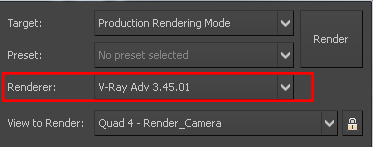
Assign V-Ray as the current renderer.
-
Open the Material Editor (M) to assure the materials are properly set and assigned.
Test Render
-
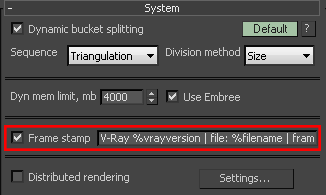
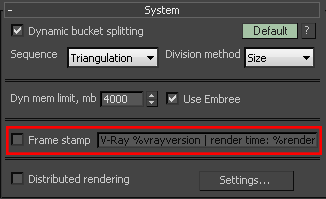
Before we do our first rendering, turn on the Frame Stamp option in the System rollout so we can see render times.
-
Render.
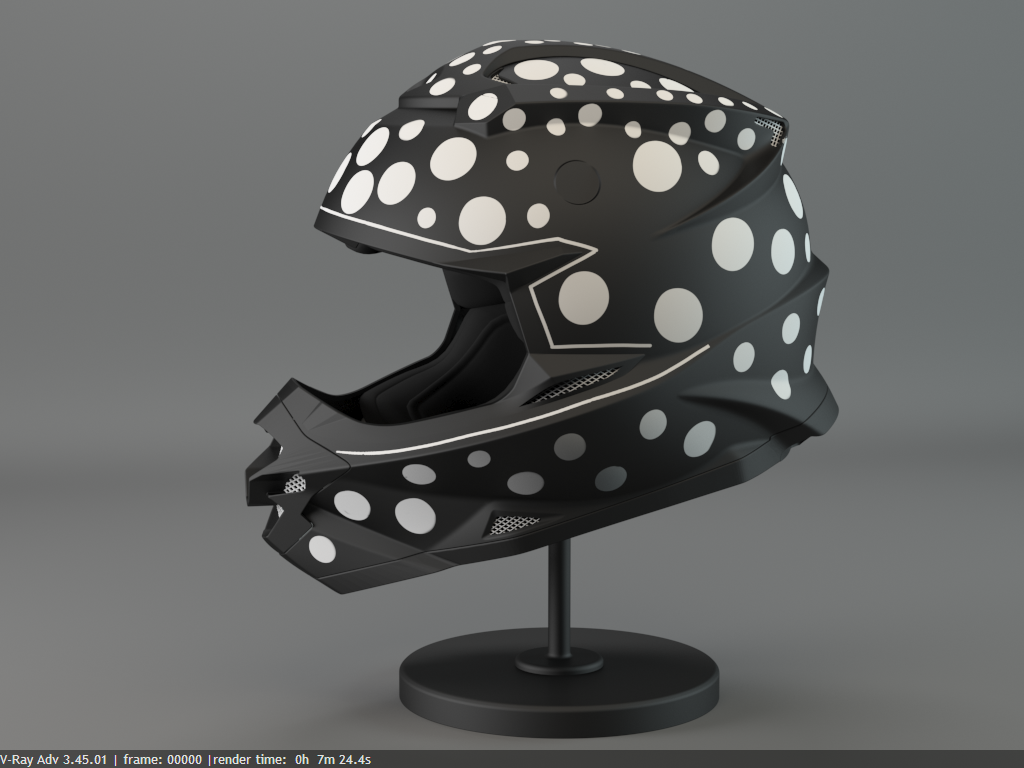
That is what we get with all default V-Ray Settings. To make the lighting a little more interesting, add global illumination and area shadows to the rendering.
Set Up GI and Shadows
-
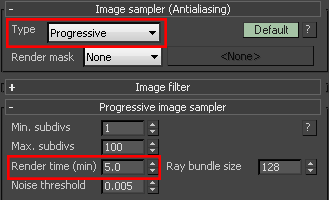
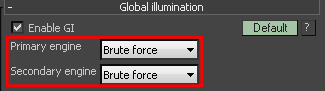
Go to the Image sampler rollout and set the Image sampler type to Progressive.
-
In the Global illumination rollout , turn on Enable GI. Set both Primary engine and Secondary engine to Brute force.
-
Render the scene.
-
If V-Ray lights are not being used, then turn on the Area Shadow of the light. As all lights within this scene are V-Ray lights, this step isn't needed in this case.
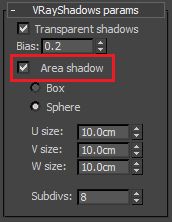
Now we have the area shadow.
Reduce Noise
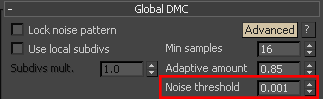
The image in this case looks good. If the shadows are too grainy, the noise can be reduced through the DMC sampler parameters.
In the Global DMC rollout, set Noise threshold to 0.001.
Now our scene is ready for baking.
It is recommended that you set the Secondary rays bias from the Global Switches rollout to small positive values to avoid some artifacts on the edge padding. V-Ray will automatically assume 0.001 as a Secondary rays bias if you have accidentally left it to 0.0 in texture baking mode.
Part II: Preparing Objects for Texture Baking
In this section, we will prepare scene objects and output settings for texture baking.
Disable the Frame Stamp
-
Before continuing, disable Frame Stamp in the System rollout. Otherwise we will get the frame stamp on our baked textures as well, which we do not want.
Set Up Output Folder
-
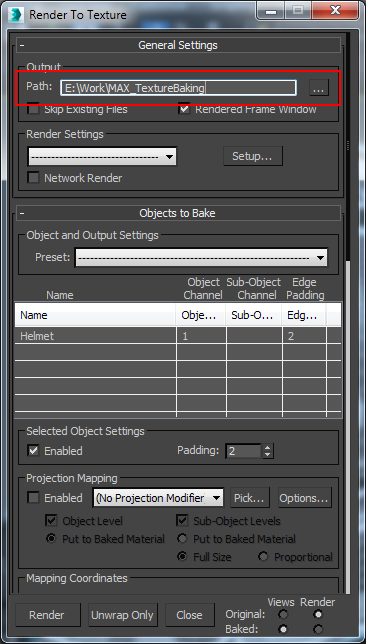
Now open the Render to Texture window from the Rendering Menu, or use shortcut key 0.
-
Choose your Output folder, where the new baked textures will be saved.
Select Object to Bake
-
Select the helmet from the scene (object named Helmet).
-
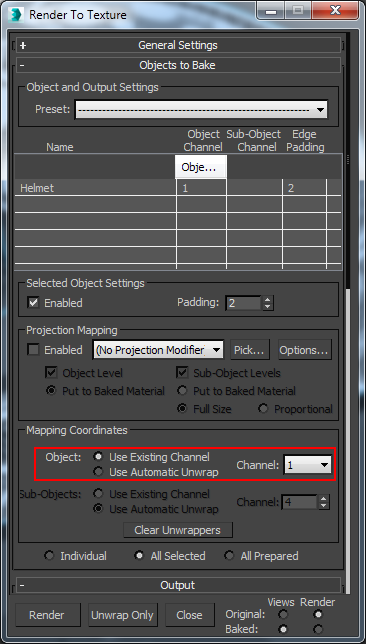
In the Mapping Coordinates section, select Use Existing Channel.
Notice that the Helmet object was automatically added in the table of Objects to Bake.
Set Up Output Settings
-
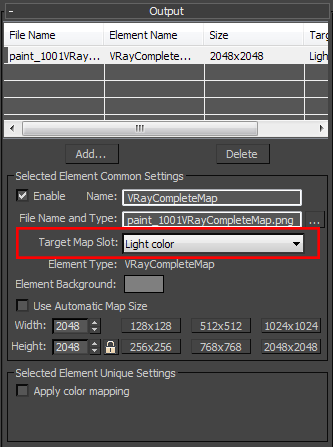
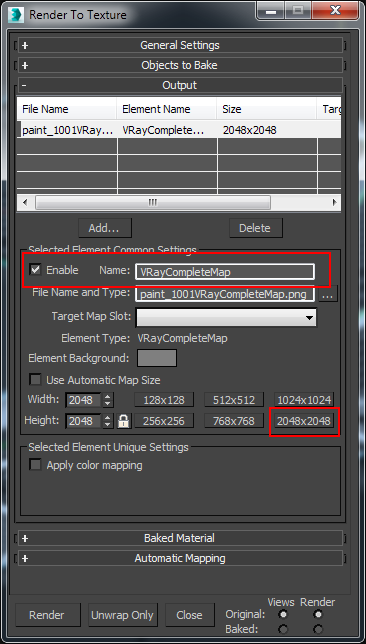
In the Output rollout, click Add... and select a VRayCompleteMap bake element. This bake element outputs the equivalent of the RGB_Color Render Element. Choose 2048x2048 for the size, turn on Enable (if necessary), and set File Name and Type so that the map is exported as a .png file.
It is important to choose the VRayCompleteMap or other V-Ray compatible bake element, because using one of the standard 3ds Max bake elements may cause a crash. You may have to scroll down in the Add Texture Element dialog in order to see the V-Ray bake elements.
For example, in our case the baked map of our helmet object will have the name: paint_1001VRayCompleteMap.png.
-
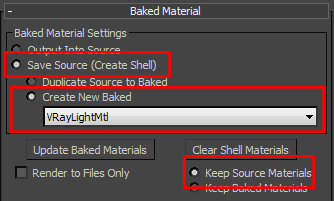
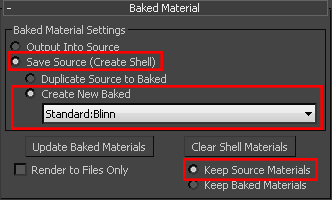
In the Baked Material rollout, choose Save Source (Create Shell).
-
Select the Create New Baked option and choose Standard: Blinn from the pop-up menu.
-
Select Keep Source Materials.
Now the helmet is ready for baking (rendering).
If Enable Gamma/LUT Correction is not enabled in the 3ds Max Preference Settings Gamma and LUT tab, then the exported maps may render too dark.
Part III: Baking the Textures
We will now bake (render) the textures.
-
Click the Render button at the bottom of the Render to Texture window.
-
The baking process proceeds in a row, object by object, in the order in which they were set in the table.
-
Repeat this process with the other objects that make up the scene.
If multiple objects share the same material and UV space without overlapping, these may be composited together in an image editing program such as Photoshop.
Part IV: Loading the Baked Materials
Now we will add the baked textures back into the scene.
Locate Shell Materials
-
Open the Material Editor (M) and choose an empty slot.
-
Click on the Get Material icon to open the Material/Map Browser.
-
Select Browse From:Scene. You will notice that there are two new materials. They are Shell Materials and contain both the original V-Ray Material and the new Baked Material in them, as we specified in earlier steps.
Edit Shell Material Parameters
-
Drag the new materials into the Material Editor as shown.
-
In the new Shell Material Parameters, choose the Baked Material for Viewport, and Original Material for Render.
This simply means two things: First, if we do a new fresh render (F9), the objects will use their original material (VRayMtl). Second, in all the viewports, the objects will use their baked material (Standard).
Set Self-Illumination
-
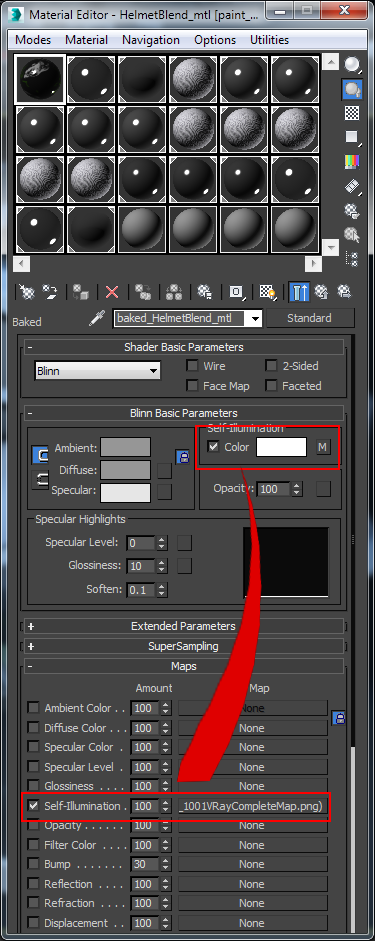
Select the new Ground Shell Material called HelmetBlend_mtl[paint_1001].
-
Turn on Self-Illumination and select a pure white Color (255, 255, 255). See that there we already have the Baked Map attached.
-
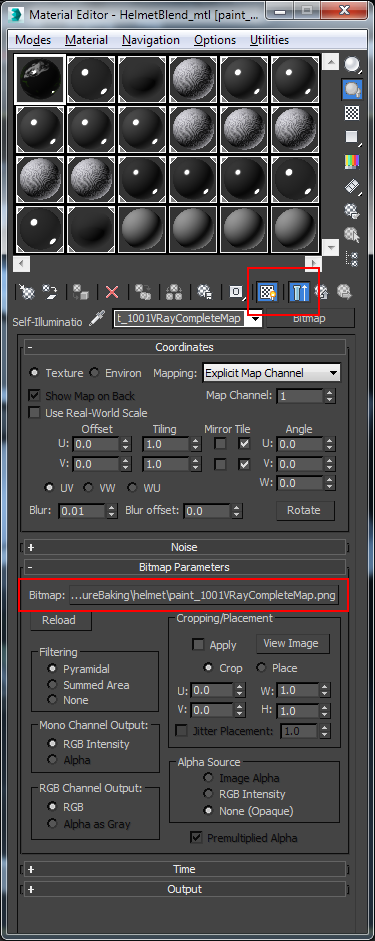
Go to the Self-Illumination Map, and turn on the Show Map in Viewport icon.
Viewport Results
-
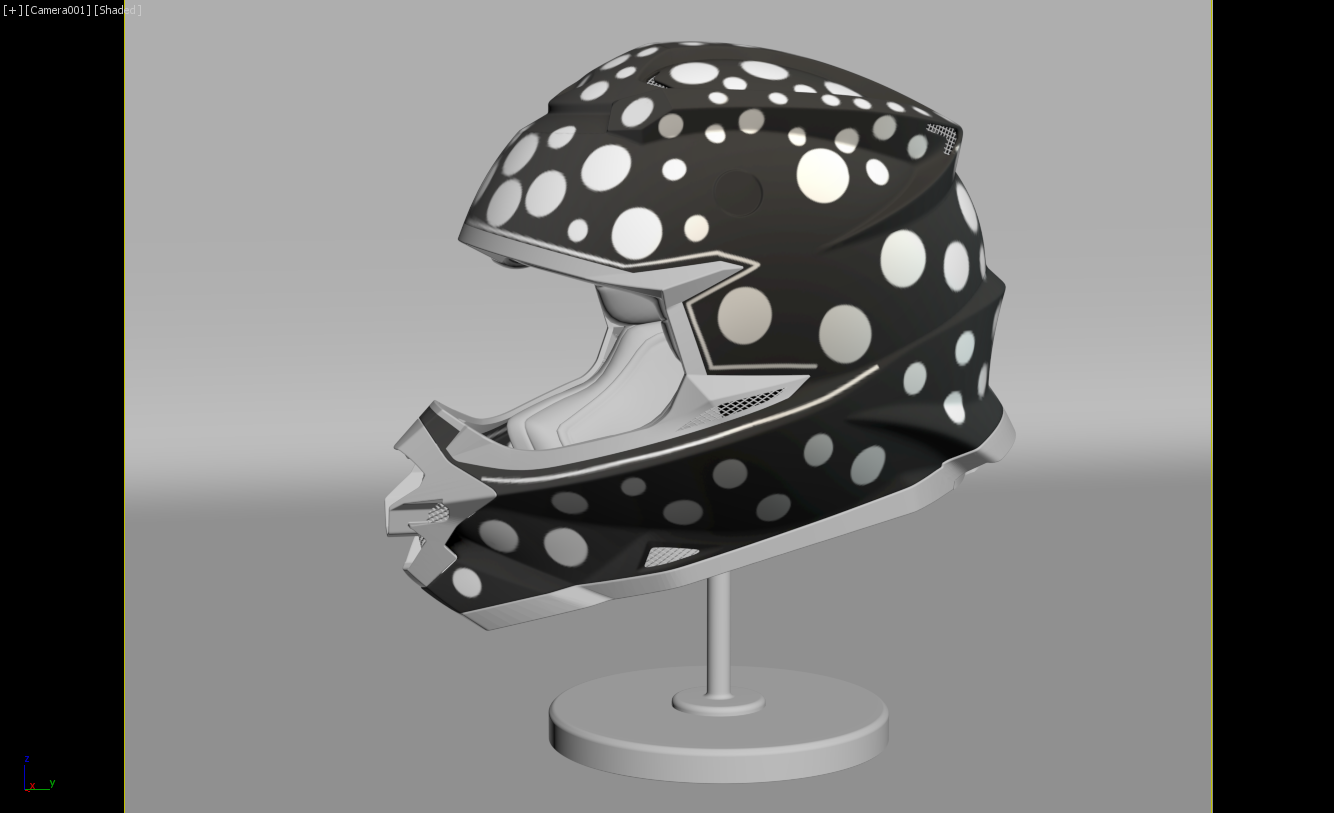
In the viewport, you should be able to see the helmet with its already baked map.
Note: if you forget to turn on the Show Map in Viewport icon, the viewport would look just like this:
-
Repeat steps from 4.7 to 4.9. for the other materials in the scene.
Now the viewport should look like something like the image below--notice how the Edged Faces (F4) can be also shown along with the baked maps.
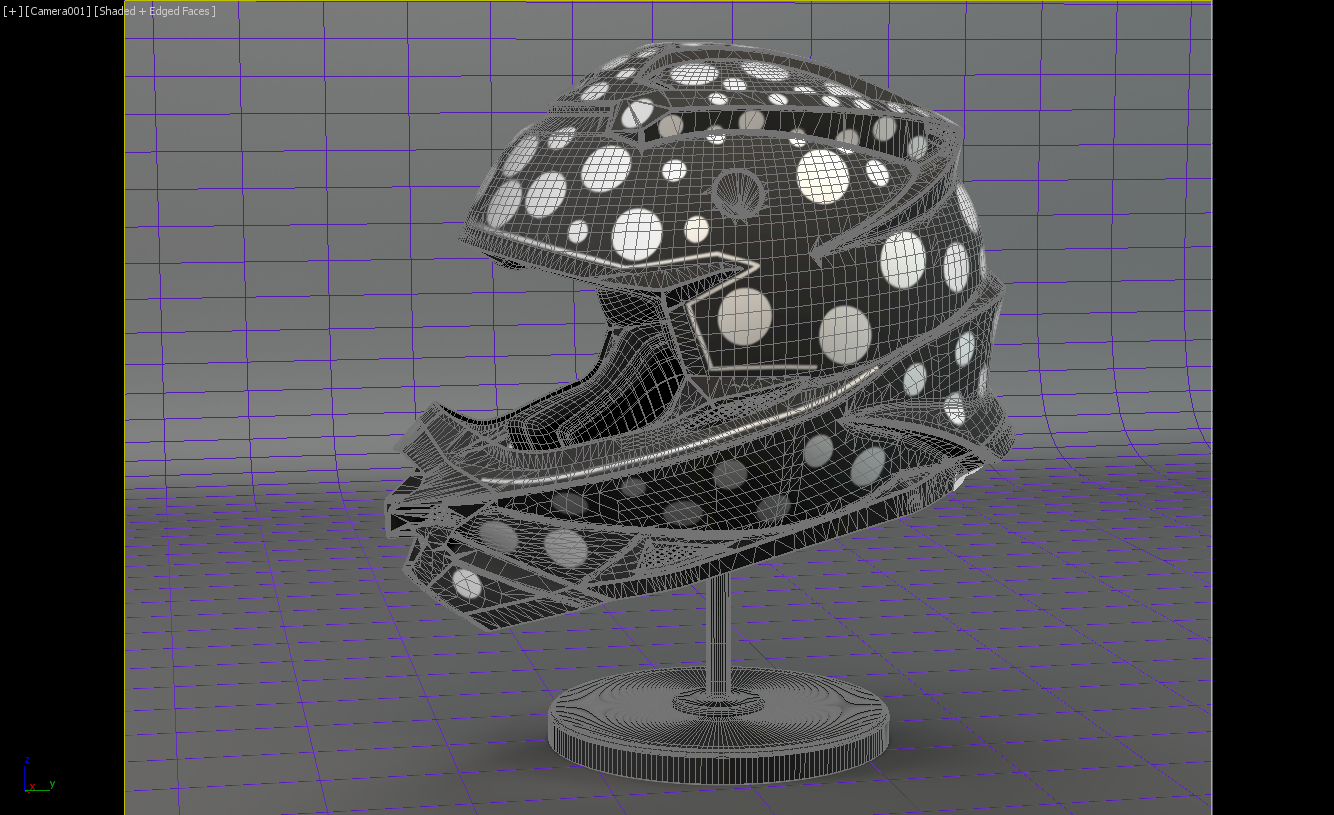
Shade + Edged Faces On Shade + Edged Faces Off
 Differences between the baked version and the previous renders are due to the fact that reflection is not baked into VRayCompleteMap.
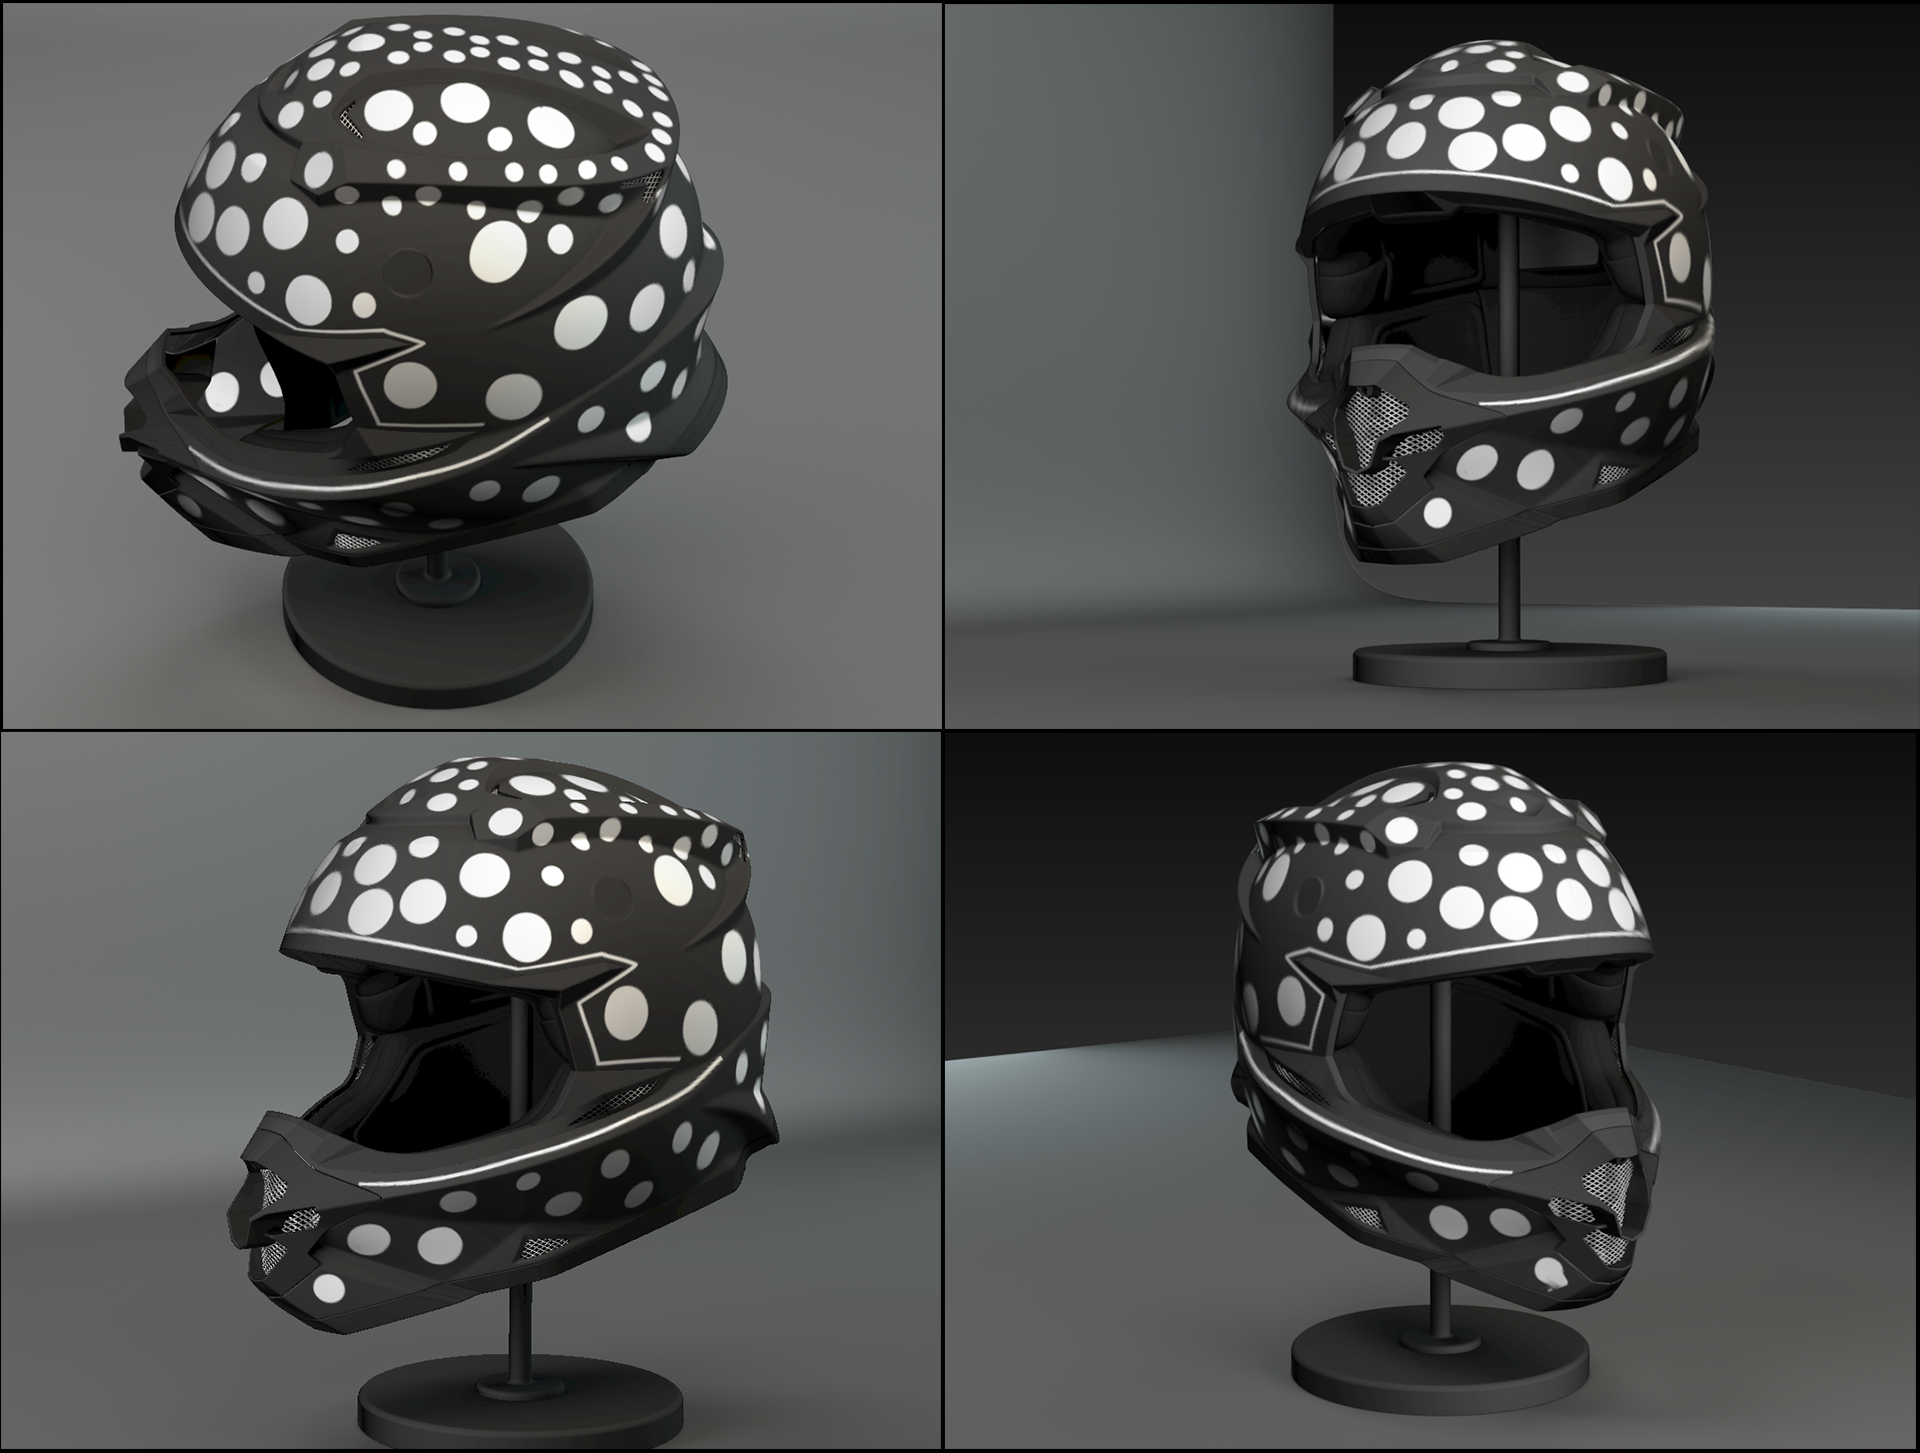
Here are some additional views of the scene from different positions:
Part V: Rendering with the Baked Materials
Finally, we render with the baked materials.
Final Render Settings
-
Open the Material Editor (M). Choose the Baked Material in the Render option for both our Shell Materials.

-
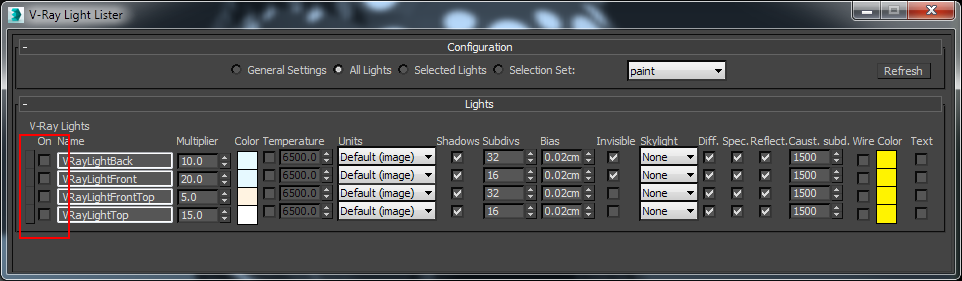
Open the V-Ray Light Lister and switch off all the lights in the scene. Actually we can even delete the lights from the scene, and it will still render fine. We have all the lighting baked into the textures already.
-
In the V-Ray settings, turn GI off, Environment (Skylight) off, Default Lights off.
-
Render.
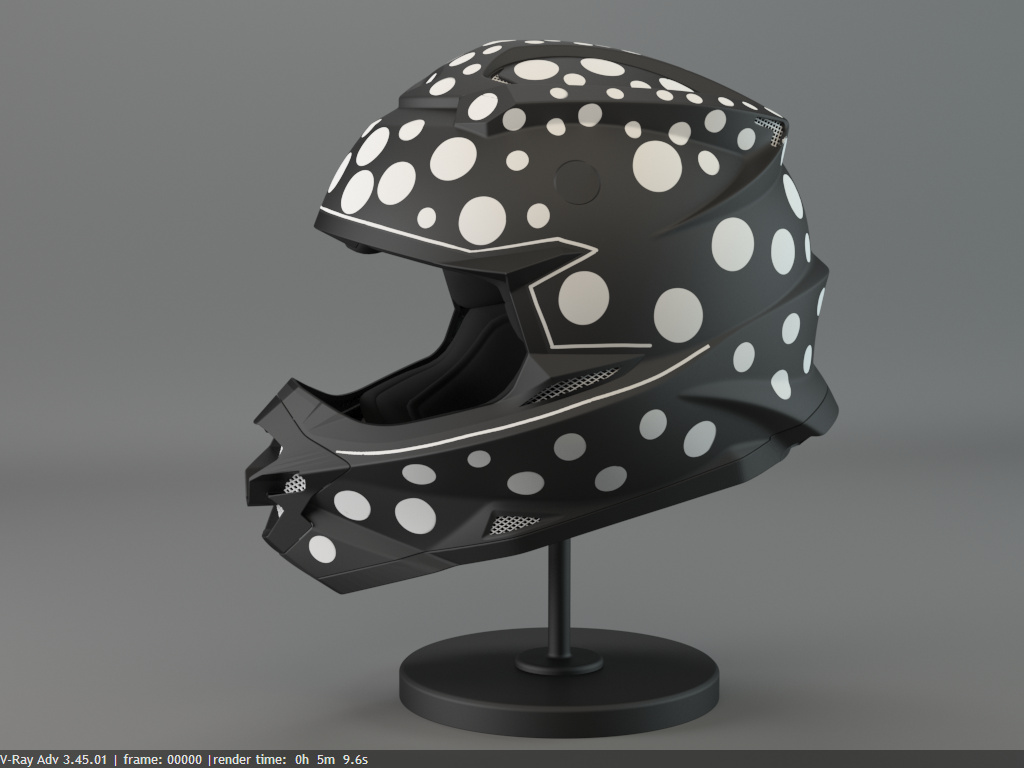
Notice the render time. In the first rendering we made, the render time was 5m:09.6s compared to 19.5 seconds that we get now. That is simply because with the baked textures, V-Ray is not doing any lighting calculations. You can even switch to the default Scanline render and still get the same result.
Having all this in mind, you can animate a camera and render a whole fly-through animation with very short render times per frame.
You can download the resulting scene and assets here.
Notes
We show you another method, which can produce absolutely the same result as the above, using the VRayLightMtl instead. The new baked maps are automatically placed in the Texmap slot. To preview the baked results, follow the same workflow you used to preview the self-illuminated Standard material.