Color Corrections
This page contains information on the color corrections tools found in the V-Ray Frame Buffer.
Overview
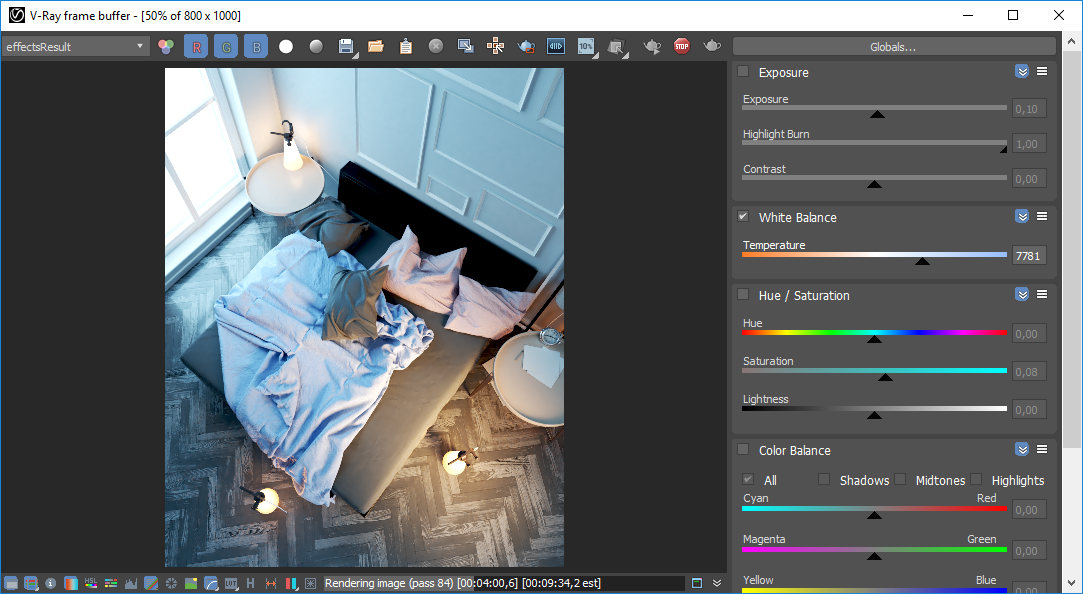
The V-Ray Frame Buffer includes a suite of color correction tools for adjusting the VFB image before saving to disk. These tools display in a window docked to the right side of the VFB.
The Color Corrections panel can be docked or undocked from the VFB by right-clicking the Show corrections control button.
UI Path
||VFB Toolbar|| > Show corrections control button

Color Correction Tools
Each color correction tool can be enabled or disabled with buttons in the bottom VFB Toolbar.
|
|
Enables White balance color correction |
|
|
Enables Hue/Saturation/Lightness color corrections |
|
|
Enables the color balance color corrections |
|
|
Enables the levels color corrections |
|
|
Enables curve color corrections |
|
|
Enables exposure corrections |
|
|
Enables usage of a background image |
|
|
Displays the image in sRGB color space. Click and hold the left mouse button to switch between sRGB color space, Gamma 2.2 and ICC. |
|
|
Enables and disables the effect of the Look Up table loaded in the Color Corrections settings. Hold down to chose between LUT and OCIO color corrections. |


Some of the corrections are applied only when the image is displayed on the screen, and are not applied when the image is saved to disk. Corrections intended mostly for display purposes, such as sRGB and ICC color corrections, are not saved to disk.
Corrections are generally applied as they are listed in the color corrections window from top to bottom. The only exception is white balance correction, which is always applied first. In other words, white balance corrections are made first, followed by exposure, hue/saturation, etc. Display color corrections like LUT, OCIO, and ICC are applied last.
You can enable or disable a particular color correction using the checkbox to the left of its name. You can expand and hide the parameters for a particular color correction using the  button.
Global Presets
Clicking the  button displays a short menu that resets parameters for a color correction to default values, and saves and loads just the parameters for that color correction.
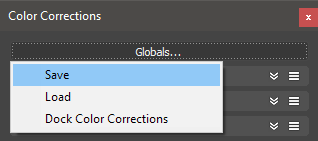
You can save the entire state of the color corrections window to a file for later reuse. Click the Global presets... button to display a menu that saves and loads the current state.
Exposure
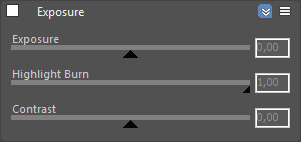
This color correction applies exposure and contrast to the image. An Exposure value of 0.0 leaves the original image brightness, +1.0 makes it twice as bright, and -1.0 makes it twice as dark. Highlight Burn selectively applies exposure corrections to highlights in the image. Positive Contrast values push the colors away from the medium gray value to increase image contrast, while negative values push the colors closer to medium grey.
White Balance
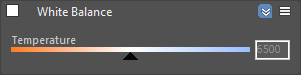
The White Balance slider corrects the colors in the image so that objects that are white appear as pure white (and not tinted blue, yellow, red, etc.) in the final image.
Hue/Saturation
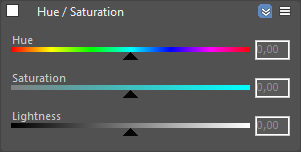
This correction applies HSL transformation on the image colors. Moving the Hue slider changes the overall hue of the image colors (grey colors remain intact). Lower Saturation values move the image towards greyscale while higher values increase the colors' intensities. Higher Lightness values add white to the image, whereas lower values subtract white from the image.
Color Balance
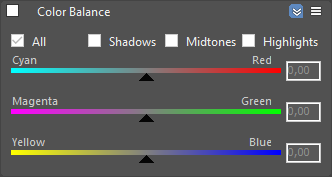
This correction adjusts the overall color tone of the image, as well as the tone of the dark (shadow), medium, and bright (highlight) colors. The color corrections are additive in that the All correction affects all colors of the image, and the Shadows/Midtones/Highlights checkboxes adjust the individual components in the image on top of the All correction.
Levels
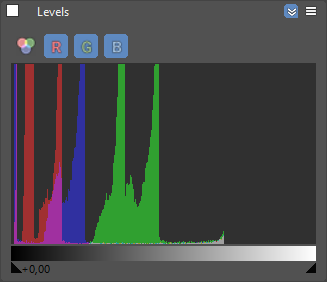
This correction shows a histogram of image color distribution, and includes a tool for remapping colors. The 

 buttons show the distribution of the individual color components only, while the
  button turns on all three components.
Move the two slider nodes below the histogram to remap the image colors. Ctrl+Left-click below the gradient between two sliders to add a new slider between them. Shift+Left-click on a slider to delete it.
Curve
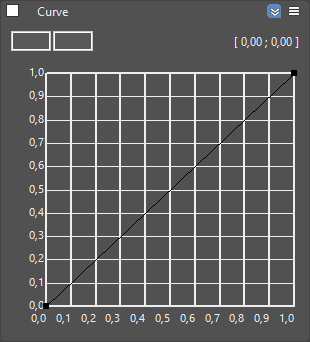
This correction allows you remap the image colors with a Bezier curve. The control also allows you to save and load .acv curve files from Adobe PhotoShop.
Controlling the View
Use the mouse wheel to zoom in and out of the curve view. Drag with the middle mouse button to pan.
Controlling the Bezier Points
Click on a point to select it. Draw a rectangle to select multiple points at once. Click and drag on a selected point or its tangents to move them. To add a new point, Ctrl+click on the curve. To delete points, select them and press Del, or alternatively Shift+click on a point. Once a point is selected, you can also use the input coordinates field in the upper left to modify its position.
Right-click on a point to bring up a context menu with additional options for that point:
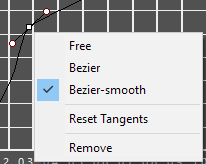
Context Menu
Right-clicking in the curve view brings up a context menu with additional options:
|
Menu item |
Description |
|
Zoom all |
Adjust the curve view so that all points are visible |
|
Undo/Redo |
Undo and redo modifications to the curve |
|
Load |
Load the curve control from a file. Two formats are available: native .bcurve and PhotoShop .acv. |
|
Save |
Save the curve control to a file. Two formats are available: native .bcurve and PhotoShop .acv |
|
Reset |
Reset the curve control to its default state. |
|
Select internal only |
Select only the points which are currently visible in the curve view. |
|
Select all |
Select all points. |
|
Snap to grid |
Toggle snapping to the curve grid. When enabled, moving points snaps them to the grid nodes. |
When working with .acv files, some approximations are performed because the curves in the .acv files are described by a different mathematical formulas.
Background Image
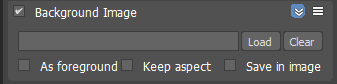
This section allows you to load an image and use it as a background for your rendering.
Load – Loads a file that is going to be used as a background.
Clear – Clears the loaded file.
As foreground – When enabled, the image loaded in the field above is used as a foreground. This means that the image is on top of the rendering and you are able to see the rendering only if the image has an alpha channel.
Keep aspect – Controls how the background image from the color correction settings is applied. When disabled it scales non-uniformly to fill the frame. When enabled the image is scaled uniformly to fit inside the frame keeping the image aspect ratio.
Save in image – Saves/bakes the Background image effect along with the image. Please note, this does not affect multi-channel images (such as multi-channel .exr).
LUT
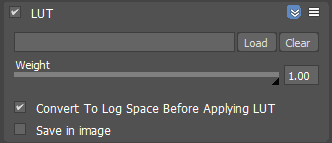
This correction allows you to remap the image colors based on an IRIDAS .cube LUT (Look-Up Table) file.
This correction can be controlled with environment variables. Settings VRAY_VFB_LUT=1 automatically turns on the LUT correction by default. A LUT file can be specified with the VRAY_VFB_LUT_FILE environment variable.
Weight – Controls the weight of the LUT correction. Use the slider to set the value, where a value of 0 means no effect and a value of 1.0 means full effect.
Convert To Log Space Before Applying LUT – Converts the Base map to a logarithmic color space before applying the look-up table.
Save in Image – Saves/bakes the LUT effect along with the image. This does not affect multi-channel images (such as multi-channel .exr).
OpenColorIO (OCIO)
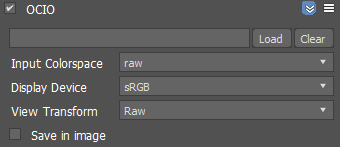
This correction allows you to apply color corrections from an .ocio color profile to image colors. When this correction is enabled and no specific .ocio profile is specified, it will attempt to read the OCIO environment variable and apply the profile specified in it.
Input color space – Specifies the input color space for the image; normally this is a linear color space as V-Ray internally works in that space.
Display device – Specifies the device on which the VFB with the image is displayed.
View transform – Specifies the viewing transformation.
Save in image – Saves/bakes the OCIO effect along with the image. This does not affect multi-channel images (such as multi-channel .exr).
ICC
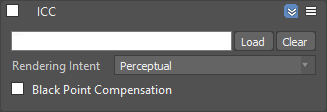
This correction allows you to apply an ICC profile to the image so that it matches (i.e. the appearance of the image in Adobe PhotoShop). This is a display correction that is only applied when the image is viewed in the frame buffer. It is not applied when the image is saved to a file.
This correction can be controlled with environment variables. Setting the VRAY_VFB_ICC_FILE allows to automatically specify an ICC profile.
Normally you would specify the ICC file for your calibrated monitor here. Programs like PhotoShop display images using your (primary) monitor ICC profile automatically. However (at least for the moment), 3ds Max is not a color-managed application and you must manually load the monitor ICC profile into the V-Ray frame buffer in order to match the appearance of your images in PhotoShop.
Notes
-
Color corrections are applied to all Beauty render elements and some Utility render elements too. They are not applied to render elements that present masks or hold geometry or computational data for the rendered frame.