How to Make Translucent Fabric
This page provides a tutorial on how to create realistic translucent fabric with VRay2SidedMtl.
Overview
Objects like cloth allow light to pass through them even though the actual substance they are made of is not really transparent or refractive. The light passing through the cloth is described as translucency. When a light is placed behind a piece of fabric then the back side characteristics of the fabric strongly affect its overall appearance.
VRay2SidedMtl is the best choice for representing cloth and other thin translucent objects like paper, leaves etc .
In this tutorial, we examine how to use VRay2SidedMtl to create a translucent fabric material.
VRayMtl2Sided works best with geometry that has no thickness. In this tutorial, the geometry for the fabric is single-sided and has no thickness.
Step 1: Create the front material
Let's create the Front material of our translucent fabric. Open the Material Editor and go to Material/Map Browser > Materials > V-Ray > VRayMtl.
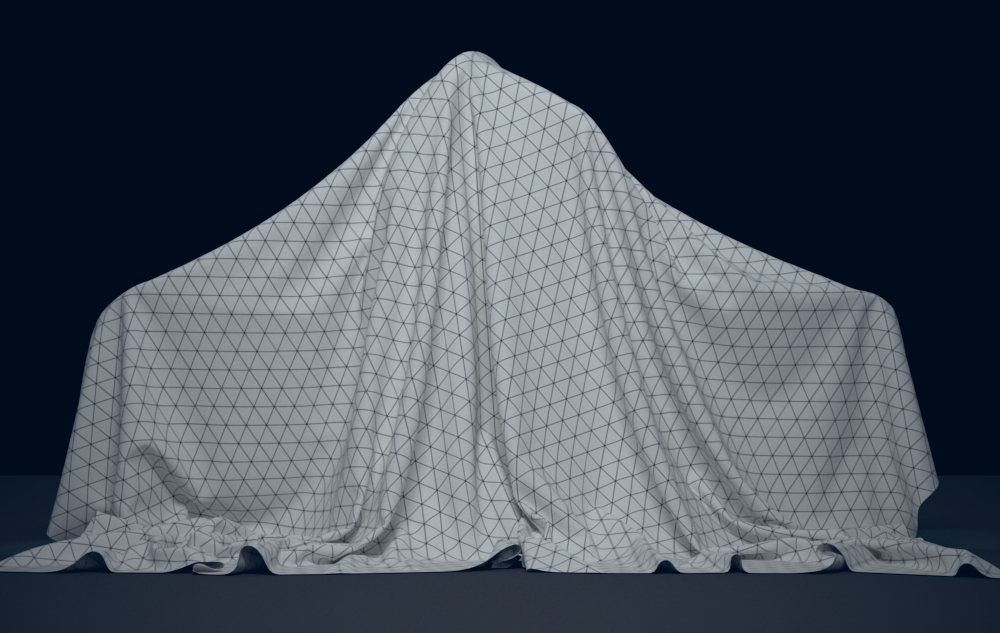
Then link a Bitmap texture to the Diffuse map slot of the Front material, and adjust the Tiling of the texture from the Coordinates rollout.
– cloths do not have refraction; therefore keep the default black color of the the Refract parameter.
– set the Reflect color to grey to introduce a mild reflectivity.
– decrease the reflection Glossiness to 0,7 to make the reflectivity more subtle.
– unlock and decrease the Fresnel IOR from the default 1,6 to 1,3 so the strength of the front material's Fresnel reflection is reduced.
– keep the rest of the parameters at their default values.
Here's how the front material looks on its own when rendered.
Step 2: Create the back material
Let's create the Back material.
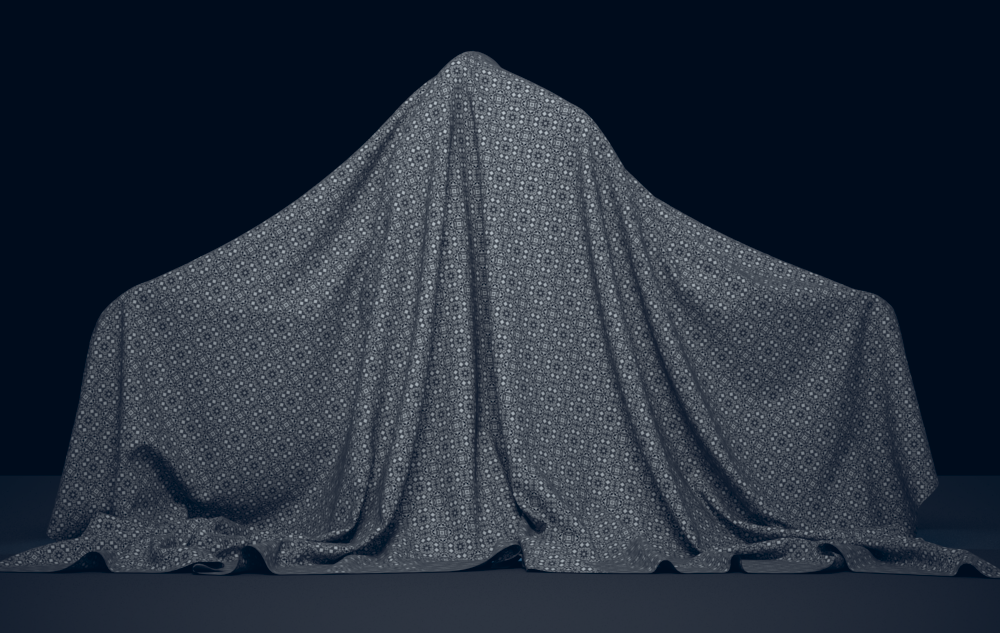
Just like in Step 1, we need a VRayMtl but with a different diffuse texture. Keep the default values of the VRayMtl's parameters.
Here's a render of just the Back material on its own.
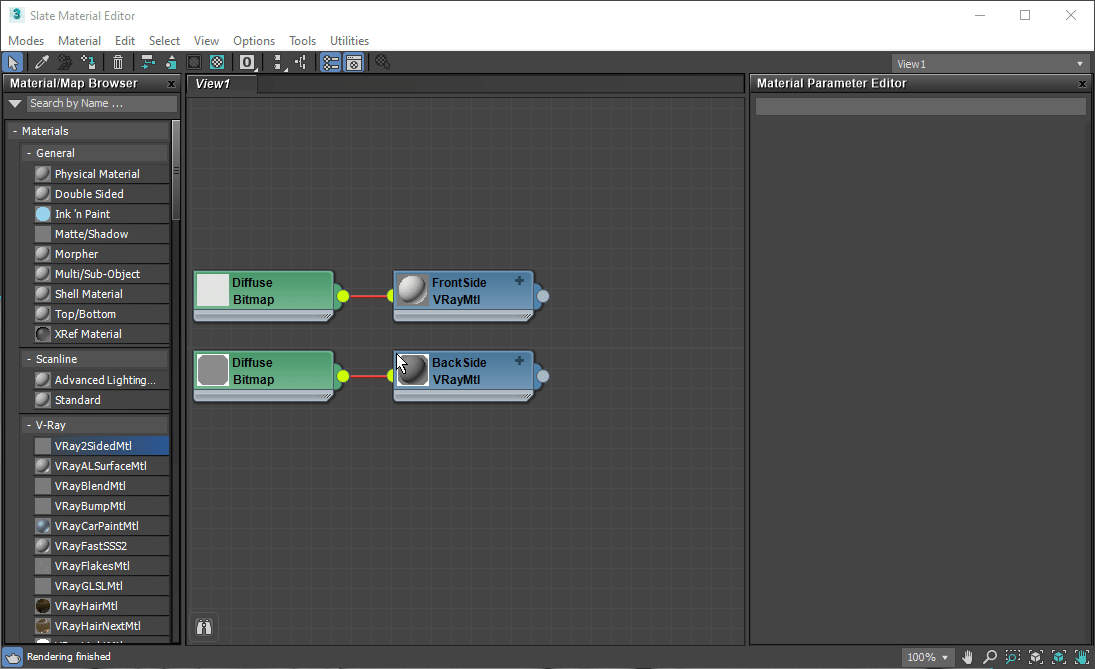
Step 3: Create a V-Ray 2-Sided material
VRay2SidedMtl has Front and Back materials that are applied to the shaded surface according to its polygon normals. If no Back material is used, then by default the Front one is applied on both sides.
Let's enable the Back material option in the Parameters rollout of the VRay2SidedMtl node by ticking the checkbox.
Then, link the Front and Back materials that were created in the previous steps to their respective slots in VRay2SidedMtl.
Step 4: Adjust the translucency
Translucency determines which side (front or back) relative to the camera is more visible in the render.
Select the VRay2SidedMtl node. In the Parameters rollout, set the Translucency color to the desired value. Note that darker colors make the VRay2SidedMtl look more solid, while lighter colors make it more sheer and allow more light from the back side to pass through the object.
Change the slider below the image to the right, to see a few different examples of the Translucency value in the 2-Sided material.
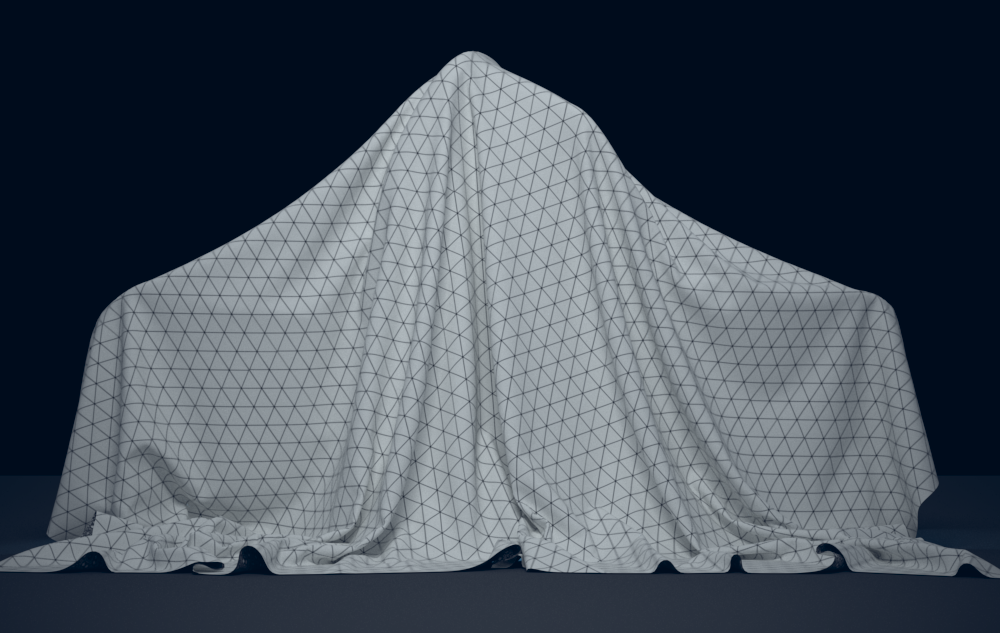
Translucency is set to black. No light is passing through and the back material is not visible.
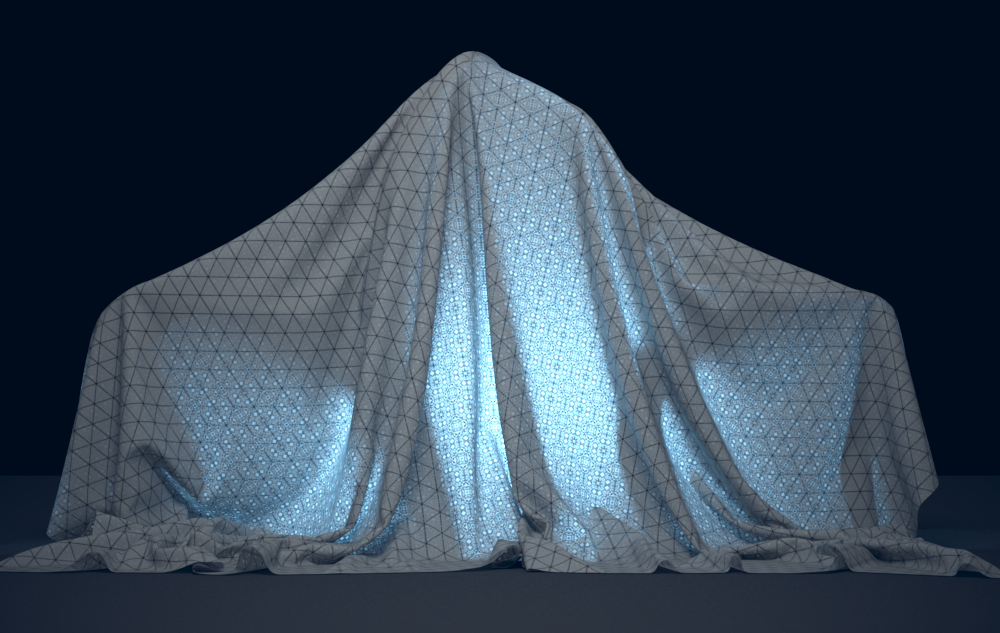
Translucency is
mid-gray,
allowing light from the back to pass through and making both materials visible
.
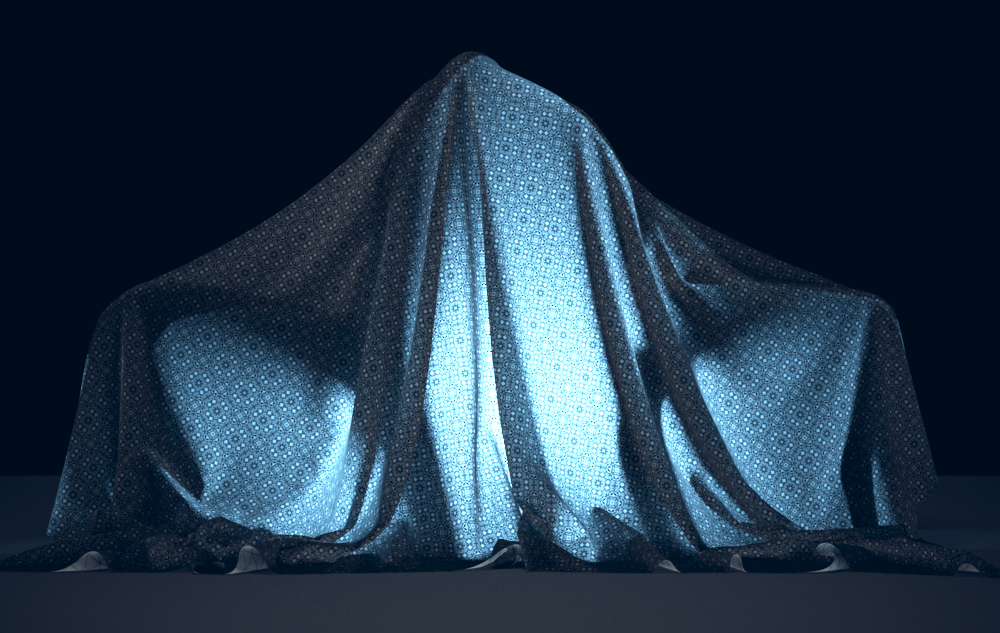
Translucency is set to white, allowing all the light to pass through. Only the back material is visible in the render.
Move the slider to see the example renders.
Final image
Here's the final image with the Translucency set to mid-grey:
Recommended next: